After sprucing up my sewing skills with some napkins, I decided it was time to tackle another item on my summer to-do list: finally sew some curtains for the dining room.
The dining room has definitely taken the back seat in all our home decorating projects over the past year. In fact, since we moved in we added chairs, a bench, and some plain white curtains from Ikea to the table and a bar cart that Will detested so it is no longer there.
Here's a picture of it at Megan's bridal shower:
We had changed out the decorations on top of the buffet a few times since this picture, and the chairs and bench aren't in here, but you get the picture. Pretty bland and boring with white-ish walls, white curtains, and a few black accents.
I've had this wonderful fabric my mom gave over a year ago, but I've never found time to actually sit down and make the dang things. This summer was the perfect time to tackle them.
I'll just start by saying this project could have been 20 times easier if one of two things had happened: 1) I had four more inches of fabric or 2) I had just asked Will to lower the curtain rods 2 inches each. But my mom had bought the fabric in Amarillo a few years ago so I didn't think it would even be worth going to Joanne's down here to see if they had the same fabric (plus I really didn't want to spend any money). In addition, Will HATES hanging curtain rods. I knew he would do it for me, but that would require probably a few days for him to around to it and I wanted to get started on the curtains pronto.
Because I didn't have enough fabric I had to improvise and add some plain white fabric somewhere. I didn't want to add it to the bottom because I didn't want it to look like I ran out of fabric (which technically, I did). So I decided to add it to the top where the curtain rod would go through the double layer. The actual curtain part of it was fairly simple: while the old curtain were still hanging I pinned where they hit the floor, took them down and measured all the sides, and made the new fabric match those.
But then I got to the top part where I had to piece together other pieces of white fabric. It was tedious. I made a few mistakes (but thankfully no seems had to be ripped and I just had to get a little more creative with the back sides). But when I finished the first one and hung it up and it looked PERFECT, I could not have been more proud. I texted my mom and my MIL and said something to the effect that I was so happy about the first one, I didn't have any motivation to finish the last one.
I did get them both finished, eventually. The second one came out a little bit on the short side, but oh well. It's not that noticeable, and there's nothing I can do about it now, anyway. But enough words, look:
The lighting is kind of hard to get good pictures, but you get the idea.
A close-up of the fabric- it's a mustardy yellow and gray damask pattern. The gray has some faint purple undertones, which helped me pick a new paint color that I'm going to get started on next week (no more flat white-ish paint!).
The part at the top that cause so much trouble. I'd say it came out pretty well.
Why hello there, Lucy Fat!
They add so much vibrancy to the room! I am smitten!
And while I had the camera out, I thought I'd share a few shots of our updated entry. Will couldn't handle the "devil's star" light fixture that was here when we moved in, so he purchased this new light fixture from Lowe's we had both been admiring.
Obviously we're not finished with this gallery wall. I need some more pictures, I need to paint the crosses and W on the left side of the wall, and I'd like to replace a few of the black frames with some others that add some other color and texture, but for now we're working with what we got.
I finished the curtains two weeks ago, and last weekend we completely cleared the room of everything so that we could rip up the floor in preparation for our NEW laminate floors that will hopefully be installed before I start back to work. I can't wait!
Have you recently tackled any projects that have been sitting on your to-do list forever?
Showing posts with label DIY. Show all posts
Saturday, July 27, 2013
Wednesday, July 24, 2013
Green Living: Everyday Cloth Napkins
I started this post a week ago, but I got distracted by an invitation to the beach with sister-in-law. Story of my life summer.
------------------------------------------------------------------------------------------------
So it looks like I'm failing miserably at my goal to post at least twice a week over the summer, but there's so many other fun things to do that I'm not too worried about. I am making progress on my other goals, though, so I think I'll be able to say it was a productive summer.
Today I want to talk about something very important to us: living a green life. Like we must take care of bodies because they are our temples, we must take care of our world because we were only given one. Just because we can use all kinds of chemicals that are toxic to our bodies and the earth, eat foods that are killing us, and create massive amounts of waste, does not mean we should do it. Now, I realize that eliminating all toxins and living with minimal amounts of waste is almost impossible in today's world. You can't go to the "healthy" grocery store to buy all your groceries without also buying packing, which even if you recycle, still in some ways becomes waste. And let's talk about toxins in our homes. I won't belabor everything that is toxic to you because far more educated people have already done it. I hear all the time from people that "everything can give you cancer, so I'm not even going to try."
PEOPLE. For reals. Yes, there are a lot of hazards and a lot of work needs to be done, but taking two or three small steps in the right direction still makes a difference. If everyone in the United States made three positive changes toward removing toxins from their daily lives, that would be over 600 million steps in the right direction (according to the 2012 United States population count). I'm not calling for everyone to try and live off the grid. I'm asking you to set out all those boxes from the gifts from your recent wedding shower on recycle day instead of trash day (ahem, lady down the street).
And yeah, living a green life does in some ways require a little more effort. I mean, we have to walk seven steps to the garage to put the recycling in the garage instead of the trash can in the kitchen because we don't have room for both in the kitchen. And it takes me five minutes to whip up a batch of my homemade all-purpose cleaner every two or three months instead of going to the store and picking it up off the shelf. But it all comes back to this: we each must do our part. It's like this quote:
We each have a responsibility to take care of this beautiful gift God has given us so that generations to come can also enjoy it. I will be sharing some of the small steps we've taken in our home to be more responsible to the environment.
This is one thing we've been doing since we got married (well, when we've been in our own home) and not only is it green, but it has saved us a ton of cash and we all know how tight money is when you first get married. And if you think about all the money we'll save in our lifetime by not buying paper napkins and paper towels, that might just change you mind to switch, too.
I first saw the idea to make some cloth napkins when I babysat for a coworker in college. She was the first vegetarian I met, and after spending some time getting to know her I would definitely say she was crunchy. Or hippy. Whatever phrase is less offensive, because she really was pretty cool. Being from a small town in the conservative Texas Panhandle, there really weren't too many of us crunchy people floating around several years ago. Anyhow, I babysat for her a few times and when I was feeding the kids dinner, I noticed a basket of brightly colored and patterned cloths, which I later realized were napkins.
The idea stuck with me and when Will and I got our first apartment, I decided to make some for us. I got some fat quarters from JoAnn's fabric when they were on sale for 99 cents and used my mother's-in-law sewing machine. I think everyone thought I was crazy at first, but when we moved in with my in-laws I brought some of the napkins and my MIL liked them so much she requested some for Christmas. After we got married I spent a few of our Bed Bath and Beyond gift cards on some bar rags, which I also really like for this purpose. We use them as napkins while eating, rags for wiping down the counters, mopping up spills, etc.
We needed some more since the ones I made a few years ago are kind of getting ragged and the bar mops are all pretty much stained. I still had some fat quarters left over from my original purchase a few years ago so those were all I used.
Please note that I am a super novice sewer. Not just novice, but super novice. My mom taught me to sew when I was a wee kid, but I really haven't sewed much since then. If I can do this, so can you. I don't really have any detailed instructions, but this is basically what I did:
1. Pick some fat quarters out of the quilting section when they're on sale. I suppose you could do cutesy matching ones, but I kind of liked the idea of all completely different ones.
2. Wash them.
3. They may end of up being all different sizes, and for me, that was okay. If you're more OCD than I am, you can trim them up to be the same size. I figured that nobody would care if they were exactly the same size, and if they did they could go eat at someone else's house :)
4. Fold them in half hamburger-style with right-sides together and iron your fold.
5. Sew around the edges, leaving about 1.5- 2 inches open so you can fold them back with right sides out.
5. Snip of the corners to the stitch so that when you turn it inside out it doesn't bunch up in the corners.
6. Stuff the napkin through the hole you left, using a pencil or something to push out the corners.
7. Fold the remaining 1.5-2 inches of side into itself so it looks like the rest of the seams. Iron everything flat.
8. Sew around the outside to finish everything off.
9. Repeat for remaining napkins.
As you can see, all of mine ended up being different sizes. Since they're not my "good" napkins, but rather my everyday napkins, I didn't care enough to trim them all to the same size.
Also, don't knock my sewing skills. You shouldn't care about everything being perfect, and most people will be so impressed by the very fact that you use cloth napkins on a daily basis that they won't notice the crooked seams.
My pile of homemade napkins and the bar mops. To be honest, the bar mops are a little better for messy foods since they have more absorbency. However, they stain really easily and I know that kind of freaks out our guests to use what looks like a "dirty" cloth napkin. The patterned ones work really well for hiding stains and with foods that are a little less messy.
A few notes:
------------------------------------------------------------------------------------------------
So it looks like I'm failing miserably at my goal to post at least twice a week over the summer, but there's so many other fun things to do that I'm not too worried about. I am making progress on my other goals, though, so I think I'll be able to say it was a productive summer.
Today I want to talk about something very important to us: living a green life. Like we must take care of bodies because they are our temples, we must take care of our world because we were only given one. Just because we can use all kinds of chemicals that are toxic to our bodies and the earth, eat foods that are killing us, and create massive amounts of waste, does not mean we should do it. Now, I realize that eliminating all toxins and living with minimal amounts of waste is almost impossible in today's world. You can't go to the "healthy" grocery store to buy all your groceries without also buying packing, which even if you recycle, still in some ways becomes waste. And let's talk about toxins in our homes. I won't belabor everything that is toxic to you because far more educated people have already done it. I hear all the time from people that "everything can give you cancer, so I'm not even going to try."
PEOPLE. For reals. Yes, there are a lot of hazards and a lot of work needs to be done, but taking two or three small steps in the right direction still makes a difference. If everyone in the United States made three positive changes toward removing toxins from their daily lives, that would be over 600 million steps in the right direction (according to the 2012 United States population count). I'm not calling for everyone to try and live off the grid. I'm asking you to set out all those boxes from the gifts from your recent wedding shower on recycle day instead of trash day (ahem, lady down the street).
And yeah, living a green life does in some ways require a little more effort. I mean, we have to walk seven steps to the garage to put the recycling in the garage instead of the trash can in the kitchen because we don't have room for both in the kitchen. And it takes me five minutes to whip up a batch of my homemade all-purpose cleaner every two or three months instead of going to the store and picking it up off the shelf. But it all comes back to this: we each must do our part. It's like this quote:
![]() |
| Source |
This is one thing we've been doing since we got married (well, when we've been in our own home) and not only is it green, but it has saved us a ton of cash and we all know how tight money is when you first get married. And if you think about all the money we'll save in our lifetime by not buying paper napkins and paper towels, that might just change you mind to switch, too.
I first saw the idea to make some cloth napkins when I babysat for a coworker in college. She was the first vegetarian I met, and after spending some time getting to know her I would definitely say she was crunchy. Or hippy. Whatever phrase is less offensive, because she really was pretty cool. Being from a small town in the conservative Texas Panhandle, there really weren't too many of us crunchy people floating around several years ago. Anyhow, I babysat for her a few times and when I was feeding the kids dinner, I noticed a basket of brightly colored and patterned cloths, which I later realized were napkins.
The idea stuck with me and when Will and I got our first apartment, I decided to make some for us. I got some fat quarters from JoAnn's fabric when they were on sale for 99 cents and used my mother's-in-law sewing machine. I think everyone thought I was crazy at first, but when we moved in with my in-laws I brought some of the napkins and my MIL liked them so much she requested some for Christmas. After we got married I spent a few of our Bed Bath and Beyond gift cards on some bar rags, which I also really like for this purpose. We use them as napkins while eating, rags for wiping down the counters, mopping up spills, etc.
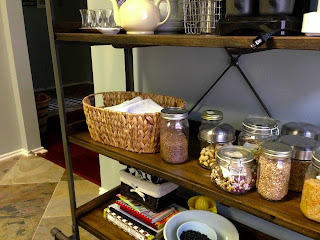
![]() |
| All our napkins stay in a basket on the shelves in the kitchen for easy access. |
Please note that I am a super novice sewer. Not just novice, but super novice. My mom taught me to sew when I was a wee kid, but I really haven't sewed much since then. If I can do this, so can you. I don't really have any detailed instructions, but this is basically what I did:
1. Pick some fat quarters out of the quilting section when they're on sale. I suppose you could do cutesy matching ones, but I kind of liked the idea of all completely different ones.
2. Wash them.
3. They may end of up being all different sizes, and for me, that was okay. If you're more OCD than I am, you can trim them up to be the same size. I figured that nobody would care if they were exactly the same size, and if they did they could go eat at someone else's house :)
4. Fold them in half hamburger-style with right-sides together and iron your fold.
5. Sew around the edges, leaving about 1.5- 2 inches open so you can fold them back with right sides out.
5. Snip of the corners to the stitch so that when you turn it inside out it doesn't bunch up in the corners.
6. Stuff the napkin through the hole you left, using a pencil or something to push out the corners.
7. Fold the remaining 1.5-2 inches of side into itself so it looks like the rest of the seams. Iron everything flat.
8. Sew around the outside to finish everything off.
9. Repeat for remaining napkins.
As you can see, all of mine ended up being different sizes. Since they're not my "good" napkins, but rather my everyday napkins, I didn't care enough to trim them all to the same size.
Also, don't knock my sewing skills. You shouldn't care about everything being perfect, and most people will be so impressed by the very fact that you use cloth napkins on a daily basis that they won't notice the crooked seams.
My pile of homemade napkins and the bar mops. To be honest, the bar mops are a little better for messy foods since they have more absorbency. However, they stain really easily and I know that kind of freaks out our guests to use what looks like a "dirty" cloth napkin. The patterned ones work really well for hiding stains and with foods that are a little less messy.
A few notes:
- We do use these to wipe us spills or clean the counters, but these are not really cleaning rags. We have specifically designated rags for the true cleaning, so these don't see nasty jobs that would make me hesitant to later use to wipe my face. I would say the bar mops work a little better by virtue of their design to wipe up spills and such.
- It's kind of hard to say how much these add to our laundry. I feel like Will and I go through a ton of laundry between our work clothes, workout clothes, hangout clothes, sheets, towels, and utility rags on a weekly basis. We don't really have enough rags to last a whole week without washing these, so I would say we probably throw all the currently dirty ones in the wash twice a week with other things. We keep a basket on the floor in the laundry room for the rags and other utility items we dirty up frequently.
- I mentioned stains earlier, but know that I took a really lax route when it comes to those. Very rarely do I spray these with a pretreatment. I mean, they are napkins and they're going to stain. If we had a clothesline outside for drying that would probably help, but my best advice is to embrace the stains and let it go.
- Obviously, these are not the best option for every situation. We had seven adults in our house for almost a week last Christmas, so there's no way we would have had enough for everyone. Plus, it was Christmas and my SIL's wedding week, so we wanted as little stress as possible. We bought a package of napkins and paper towels and didn't feel too bad about all the waste.
--------------------------------------
Questions? Thoughts? What small steps have you taken to be green in your home?
Sunday, July 15, 2012
Making a Headboard for $130 Part 2
Did you miss Part 1?
Running from the Law had some really great instructions that we pretty much followed, but one of the big costs in making a headboard is the fabric. I knew we needed a high-quality fabric because we plan on having this headboard for many years. We both like to read or work on our computers in bed, so we knew the fabric would need to stand the test of time.
I found a few different fabrics I liked (they were all mainly Ikat patterns), but ultimately I decided that even at 50% off (making each yard at least $20), it was too much because I'd need four yards. Then I had an epiphany. What about shower curtains? Most of them are made out of heavy-duty material that will stand up over time, there are some with great patterns, and they are WAY cheaper, most coming in at under $30 for the whole thing.
I went to Target (oh how I love thee), and sent this picture to Will:
I believe his response was something along the lines of "whatever you want." I love that man.
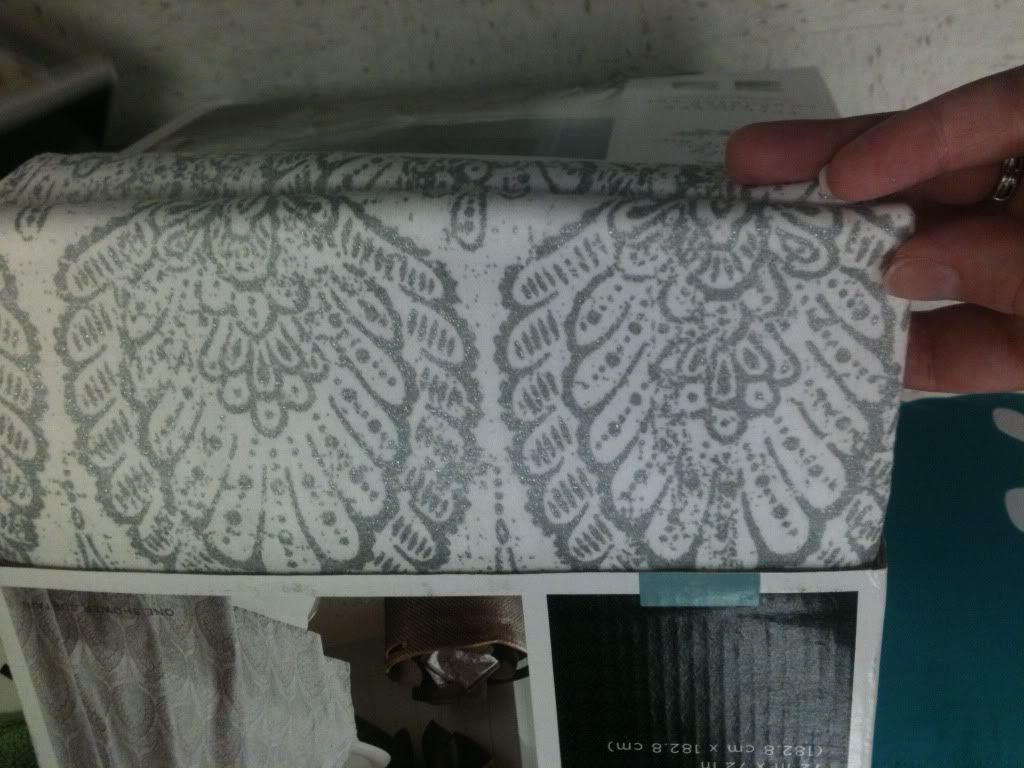
I chose this curtain because it has a white background but the pattern is silver and adds a little shimmer. Since all our walls are a dark blue I knew we needed a light colored headboard to even things out a little. The only problem was that it wasn't wide enough to go across the whole width of a king-sized headboard. I thought about buying another one (at $25 a piece it would still have been cheaper than fabric), but I didn't want there to be weird lines on the headboard and I didn't want to worry about trying to match up the pattern along each seam. Finally I decided to get some cheap white fabric and make a border along the left and right side of the headboard.
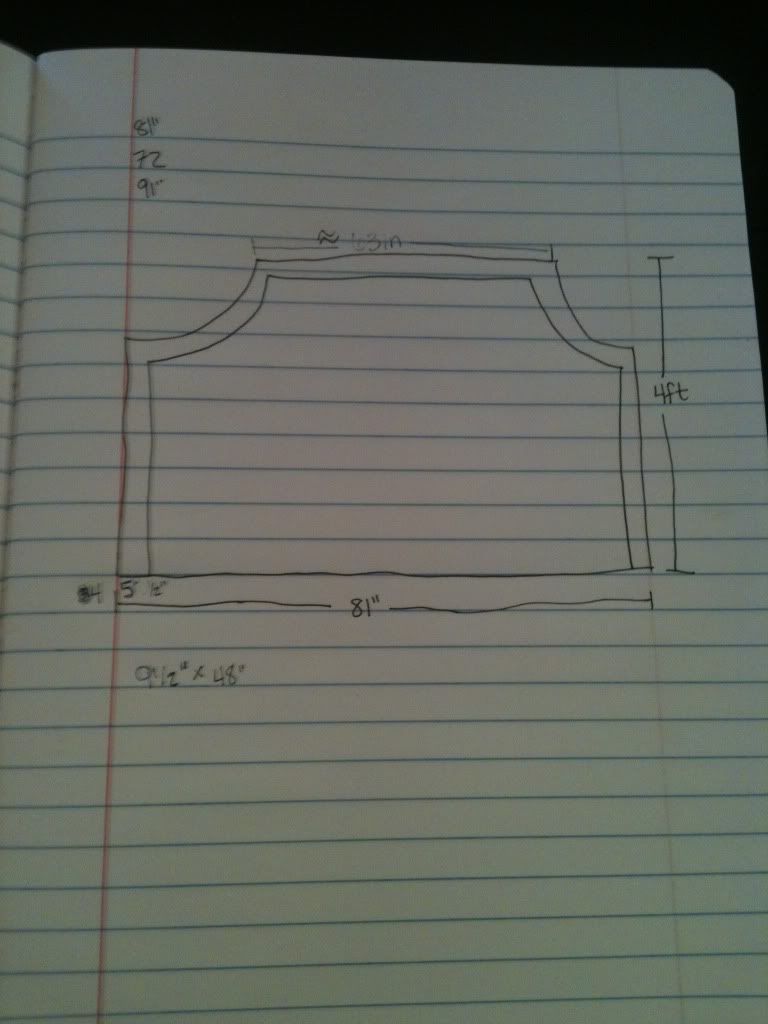
One of the keys to keeping the cost down for a project like this is sale shopping. I went to Joann's while their foam and batting was 40% off AND I used a coupon that came in their mailer for 10% off sale items. I bought the two-inch foam because I knew we would be using the really cheap plywood and I wanted this baby to be plush. This is where I decided not to go with nailhead trim- I decided it was too much of a hassle for a look that I liked just as much as without the trim. I also bought some super cheap quilt batting to go over the foam to even out all the seams in the foam and make the sides more even. This is also a good chance to save money. We ended up with only a tiny sliver of foam left- I didn't buy any excess. Make your drawing with measurements before you buy anything. Here's mine:
My goal was to make everything as simple as possible. The plywood came 4 feet tall, so that's how tall the headboard would be. (*Note: our ceilings are really high, so this look was fine for our room. If you have standard ceilings I would not suggest making your headboard this tall, or it will look very overpowering.) As you can see, I was originally planning on doing the white border around the whole headboard, but then I decided it would probably be beyond my basic sewing skills to make it look perfect and I didn't want to look at my sewing mistakes every day.
The shower curtain was 72'' x 72'', so it was plenty tall enough but about 9 inches short length-wise. I think I decided I wanted the white strips to be 4.5 inches on each side, but I added another 4-5 inches so I could wrap it around the sides and back. In hind site, I should have added at least another 2 inches of white to each side because it was almost too short to wrap around everything.
Enough talking-here are the pictures:
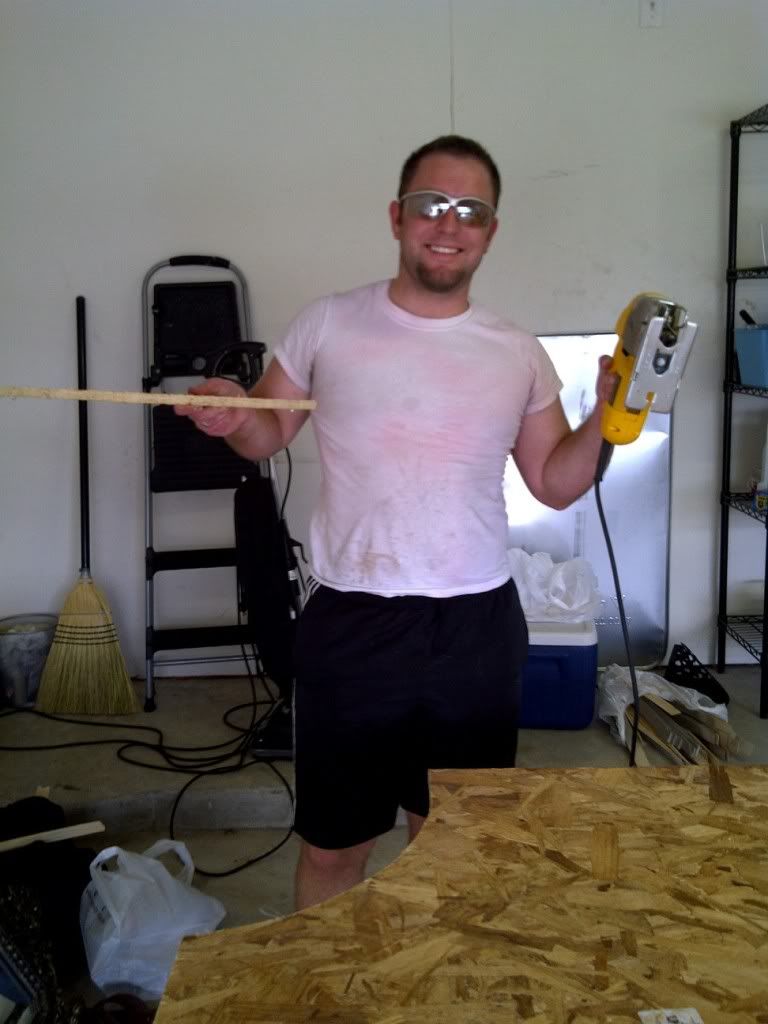
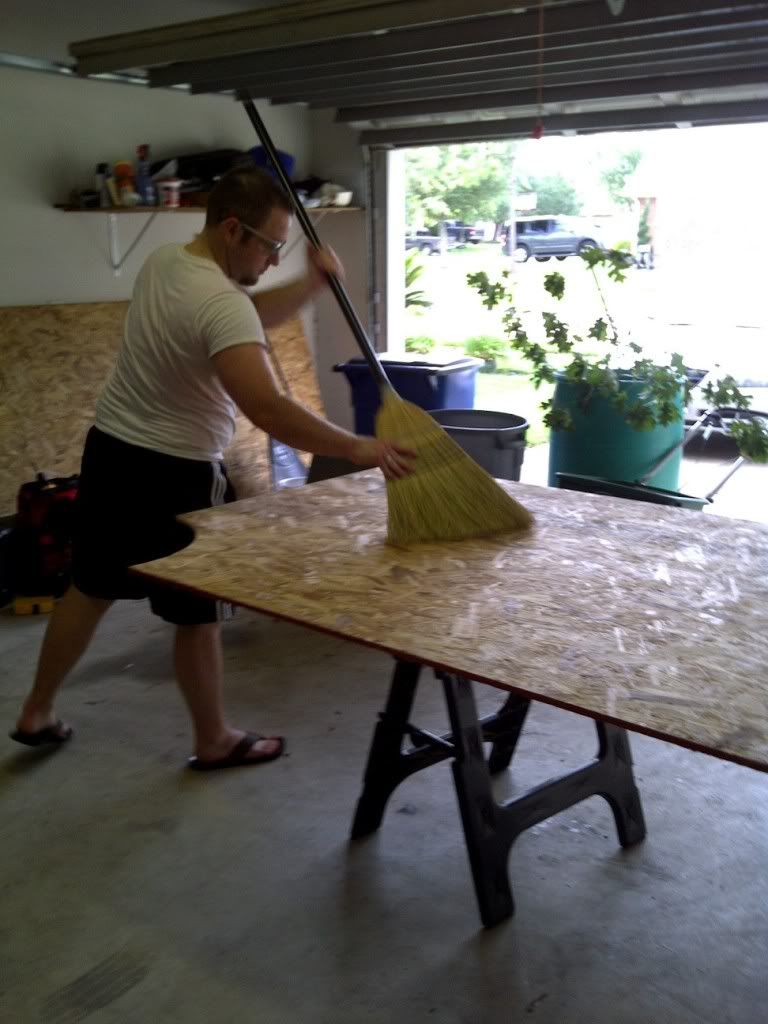
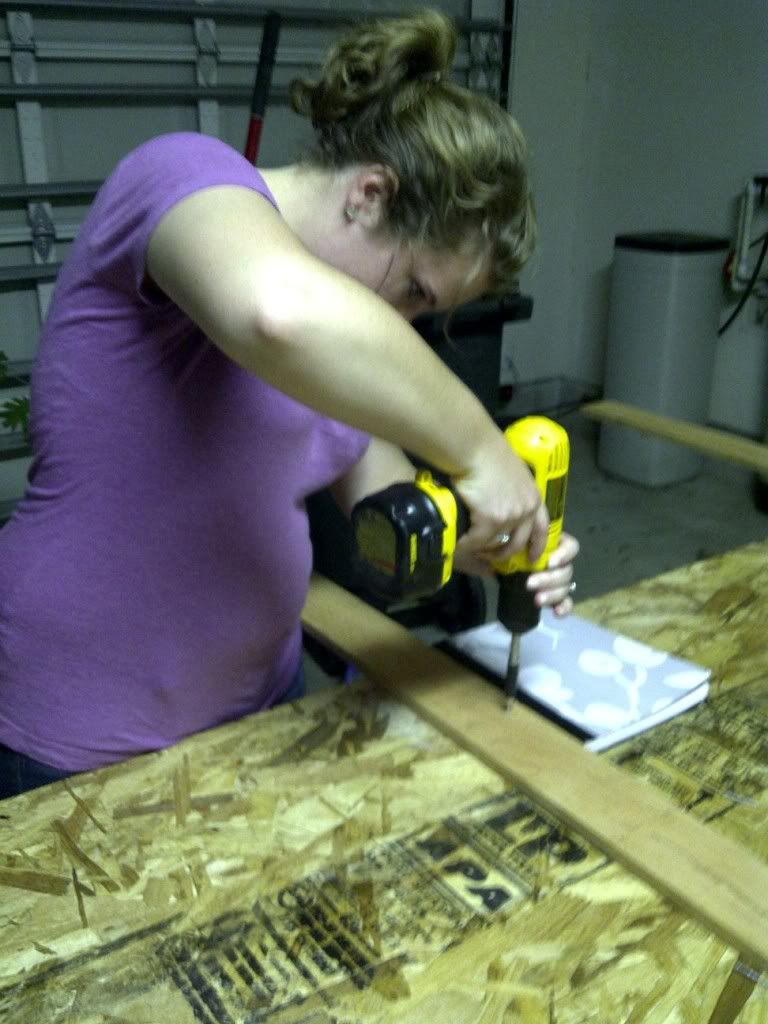
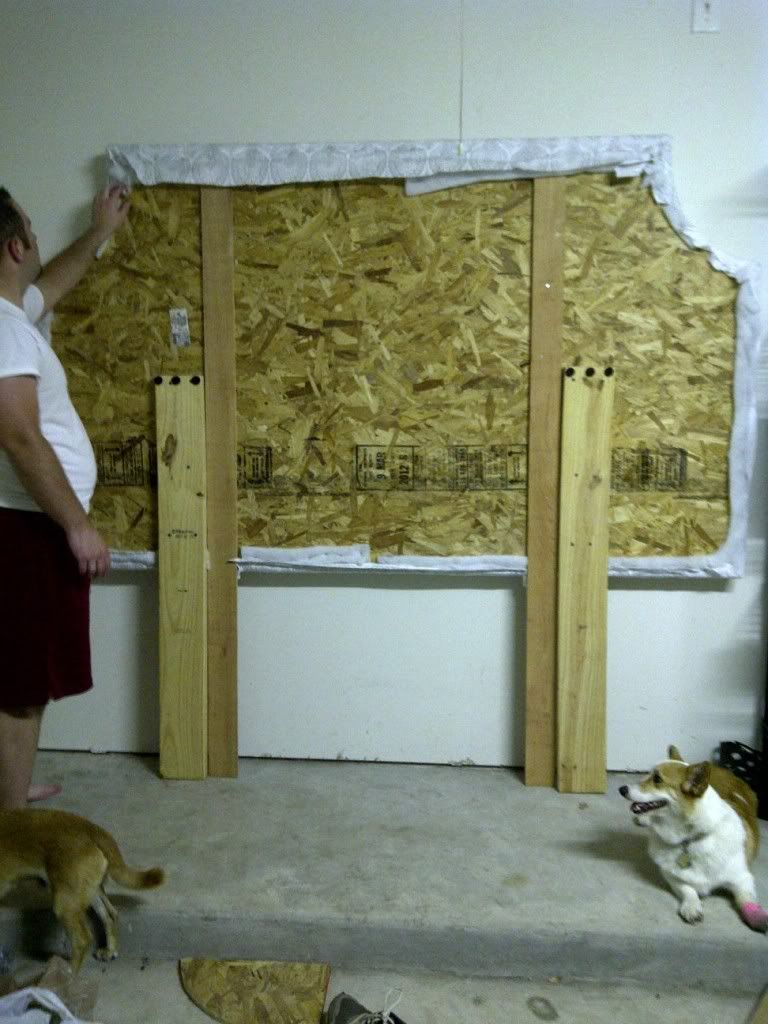
I didn't take a picture, but we used a round trash can lid as the template for cutting out the notches at the top. Make sure sweep/blow off all the sawdust before putting on the foam.
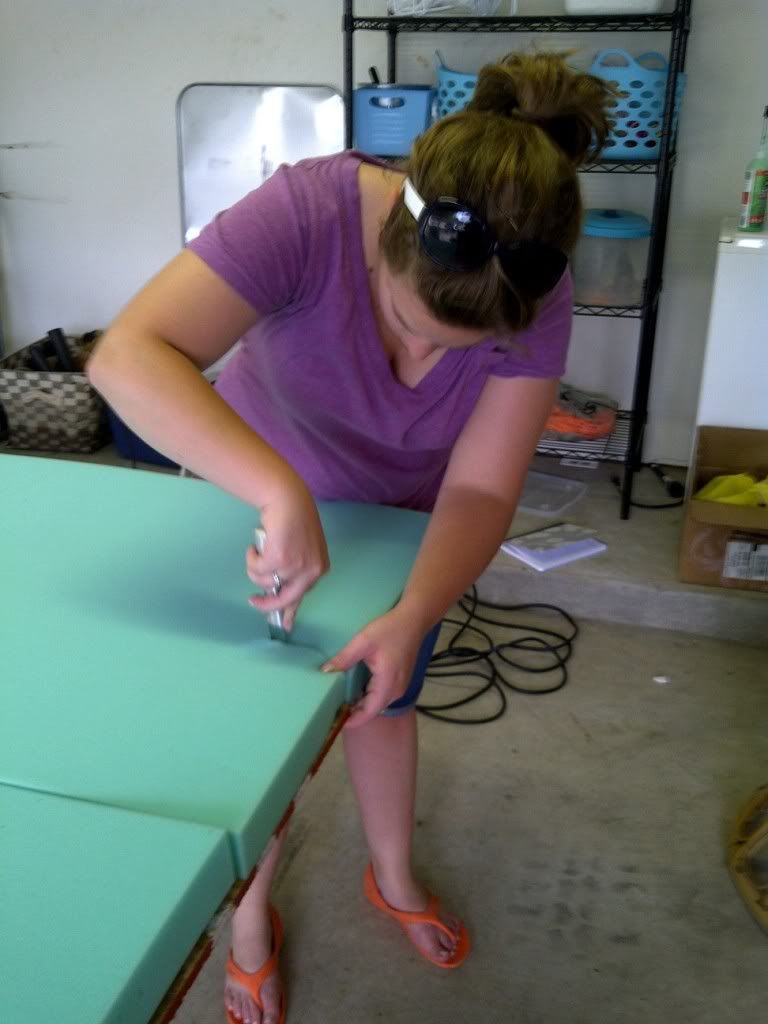
I probably would have used an electric knife to cut the edges if we had had one, but all we had were kitchen knives and they worked fine.
We also used spray adhesive to spray both the wood and the foam to ensure the foam didn't sag down over time, even though the fabric should hold it in place. When it comes to projects like these it's not worth it to take a shortcut when the results could cost way more in the long run. If you're making a smaller headboard this step probably wouldn't be as important.
I don't have any pictures of putting on the batting, but we basically put it on the top (we also sprayed the batting to the foam), and we worked around all the edges with me pulling it tight and Will staple-gunning it to the wood. I've seen people attach the legs first and stand it up to do the stapling, but Will was fine with sitting on the floor under the headboard and stapling.
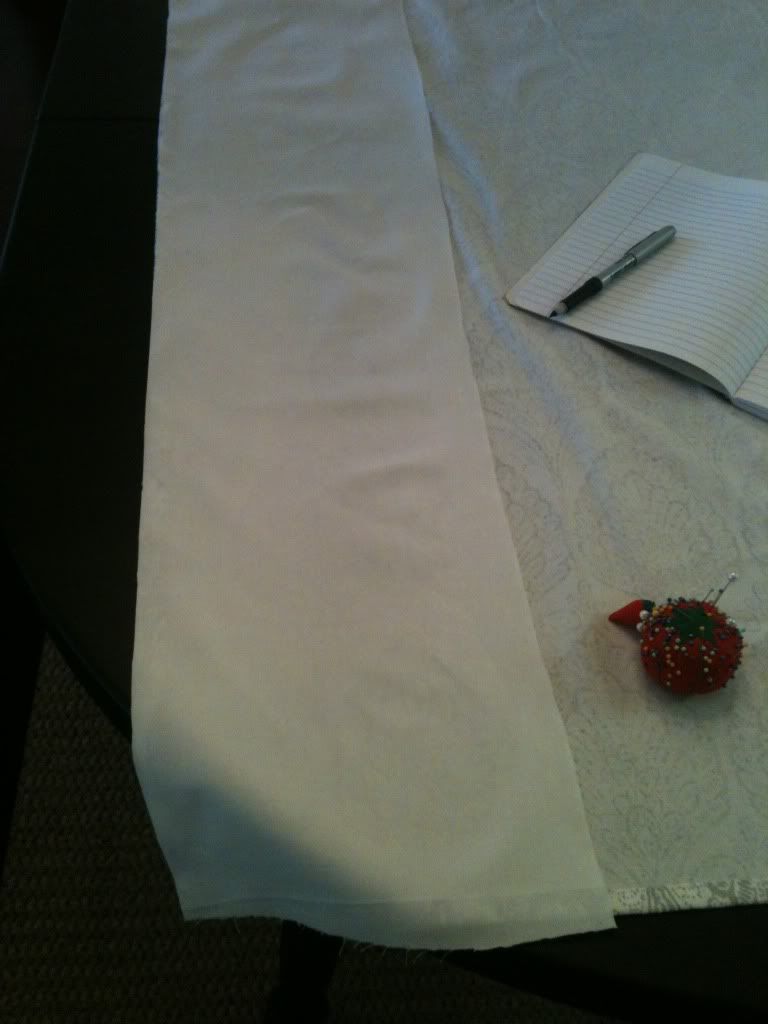
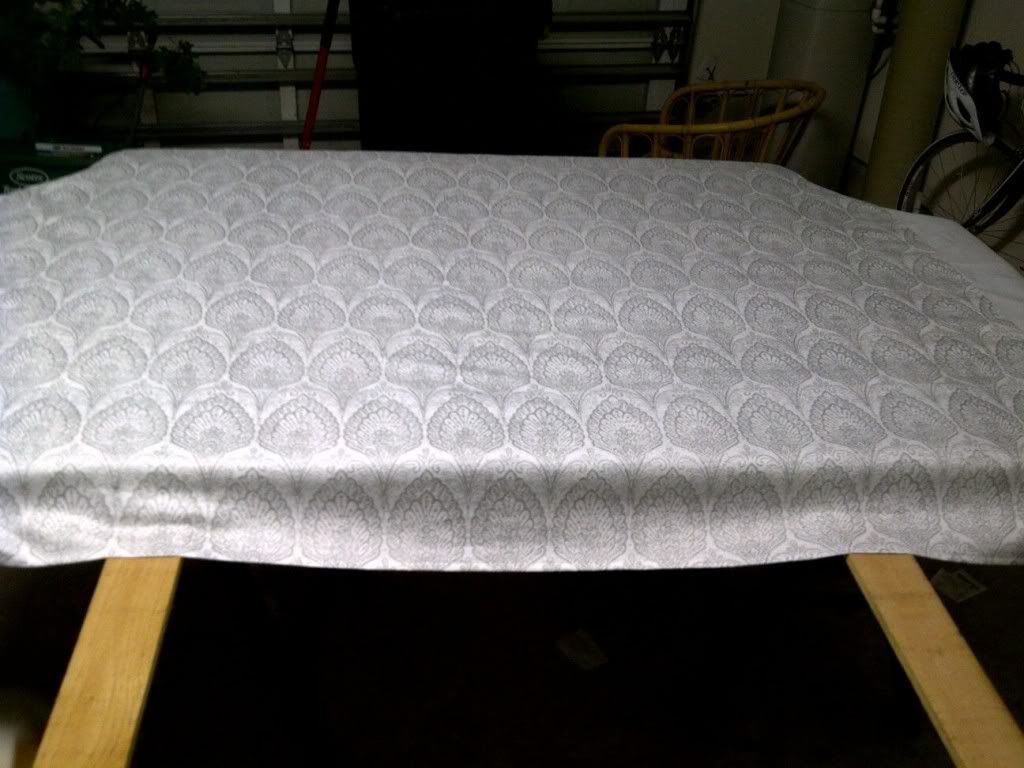
Cut the border fabric, iron, pin it to the shower curtain, and sew it on.
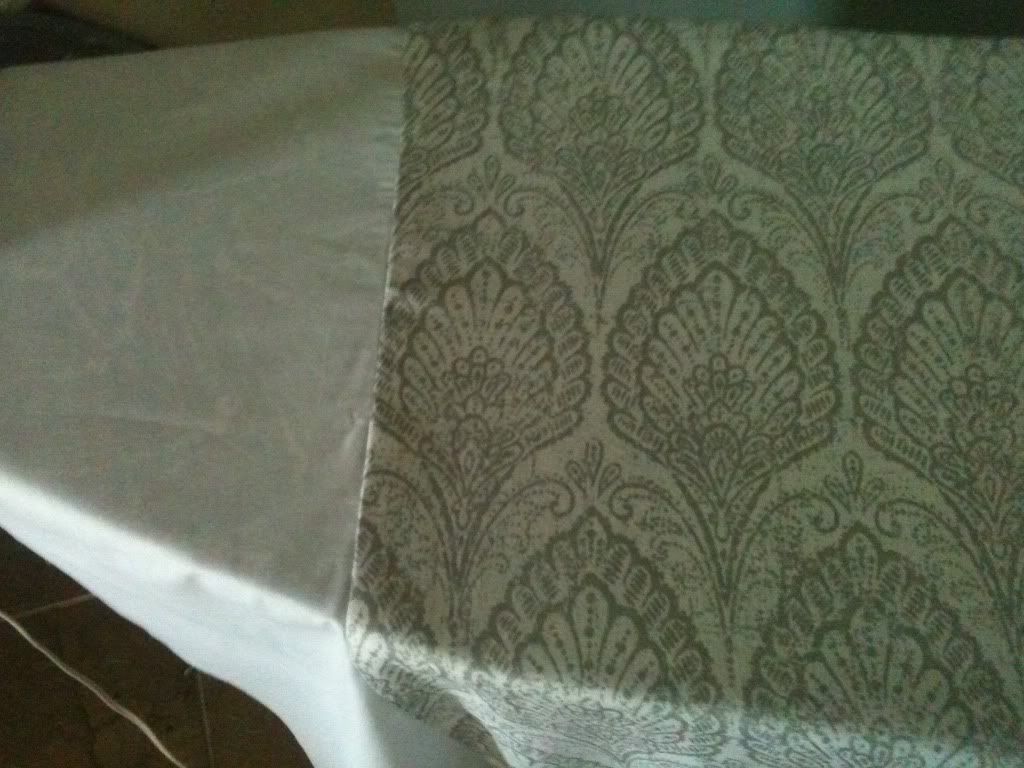
Once you're done sewing you'll want to make sure you iron down your seams so they lie flat. I ironed mine towards the shower curtain because I was afraid they might show under the white fabric.
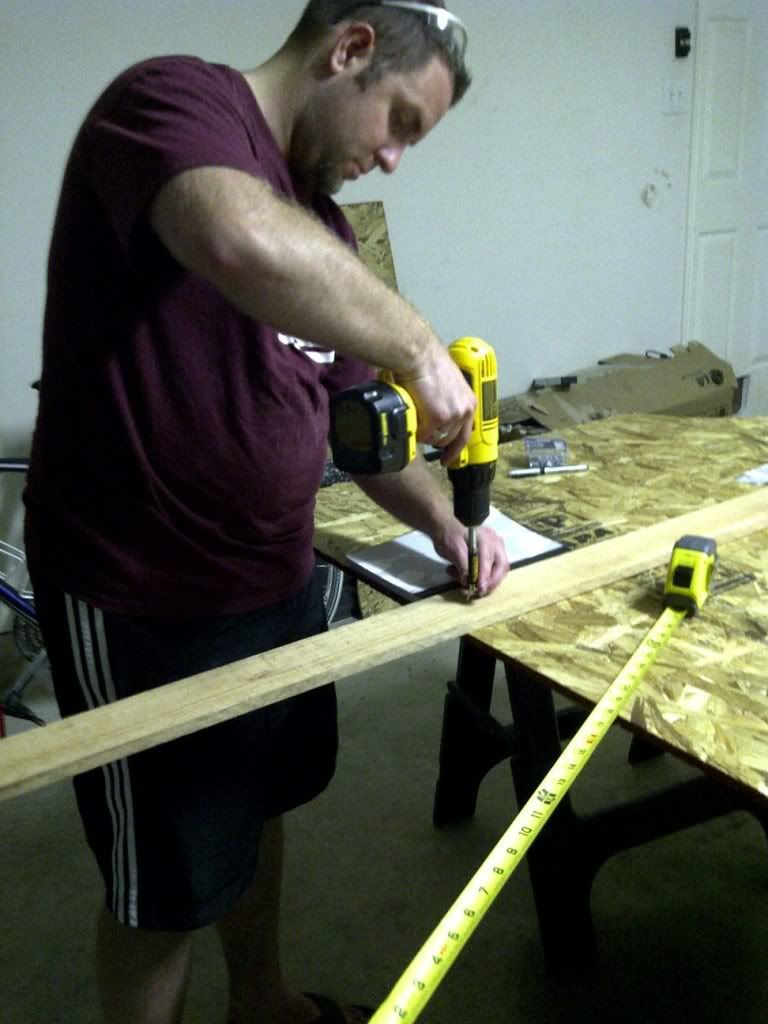
At this point we attached the legs. Will just measured how high the top of our mattress is off the ground and subtracted about 1.5 inches to determine how high to make the legs. Originally we only used two, but before we moved it into the house we added another two just to make sure it was secure (this thing was kind of heavy).
Lay out your fabric and make sure you have the same amount of white border on each side. I used the measuring tape each time we stapled just to make sure.
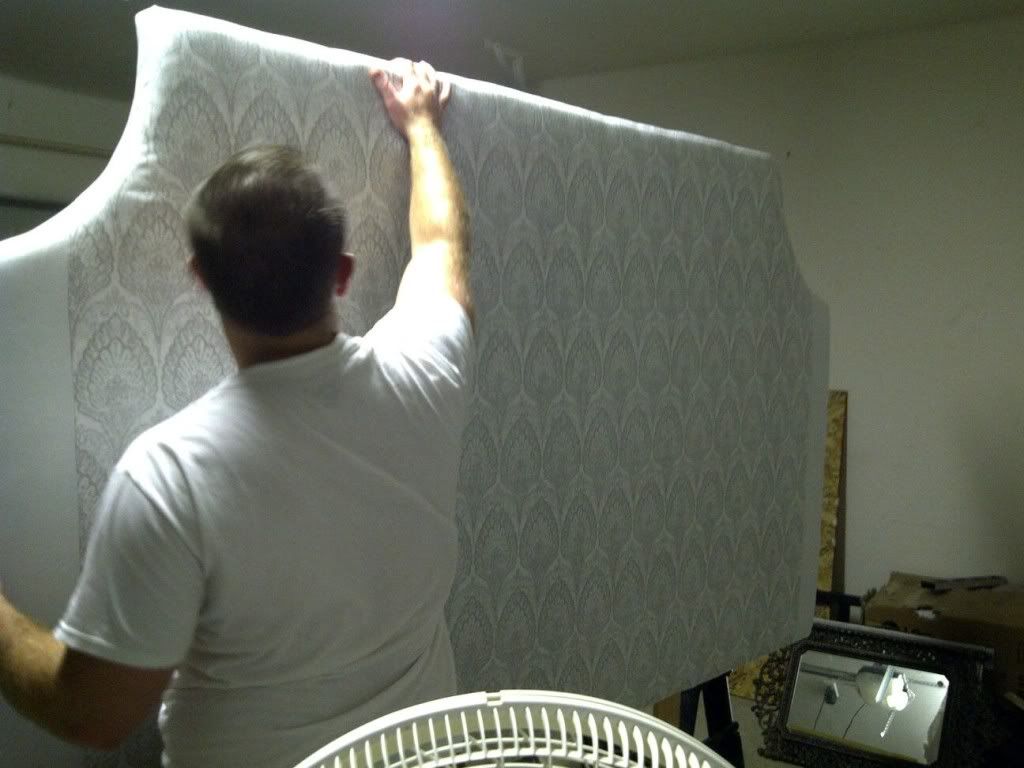
Ta da!
Like I mentioned we added two more legs just to make sure everything was secure. It's not the pretties solution but no one will ever see it. A few tutorials also had you covering the legs with fabric. We didn't do that because the legs are completely hidden by the bed.
Are you ready? Here's what it looked like when we left back in March:
And now:
We love it. Like, we LOVE love it. It's super plush, it fills up the wall, and it's everything I wanted. Will really likes it too.
The pattern is super subtle, but it's enough to add a little visual interest. The white border, in my opinion, looks intentional and not like I ran out of the other fabric. If you are making a headboard for a smaller bed, a shower curtain that's 72'' wide would be plenty to cover the whole thing (well, depending on how thick you want your foam to be).
Here's the budget break down:
Plywood: $8
Wood for legs (2x6s): free because we had it, but probably would have cost about $6 total
Shower curtain (this one): $25
White fabric: $7
Foam and batting: $85
Total: $125
$125 for a king-size headboard?! Yes, please. Most I saw online were at least $500 and way out of our price range. But utilizing sales and finding a much cheaper alternative to buying fabric by the yard, we were able to make a completely customized headboard for a price even college students can handle.
What do you think? Have you ever "hacked" something to make a more affordable but equally fabulous version?
Running from the Law had some really great instructions that we pretty much followed, but one of the big costs in making a headboard is the fabric. I knew we needed a high-quality fabric because we plan on having this headboard for many years. We both like to read or work on our computers in bed, so we knew the fabric would need to stand the test of time.
I found a few different fabrics I liked (they were all mainly Ikat patterns), but ultimately I decided that even at 50% off (making each yard at least $20), it was too much because I'd need four yards. Then I had an epiphany. What about shower curtains? Most of them are made out of heavy-duty material that will stand up over time, there are some with great patterns, and they are WAY cheaper, most coming in at under $30 for the whole thing.
I went to Target (oh how I love thee), and sent this picture to Will:
I believe his response was something along the lines of "whatever you want." I love that man.
I chose this curtain because it has a white background but the pattern is silver and adds a little shimmer. Since all our walls are a dark blue I knew we needed a light colored headboard to even things out a little. The only problem was that it wasn't wide enough to go across the whole width of a king-sized headboard. I thought about buying another one (at $25 a piece it would still have been cheaper than fabric), but I didn't want there to be weird lines on the headboard and I didn't want to worry about trying to match up the pattern along each seam. Finally I decided to get some cheap white fabric and make a border along the left and right side of the headboard.
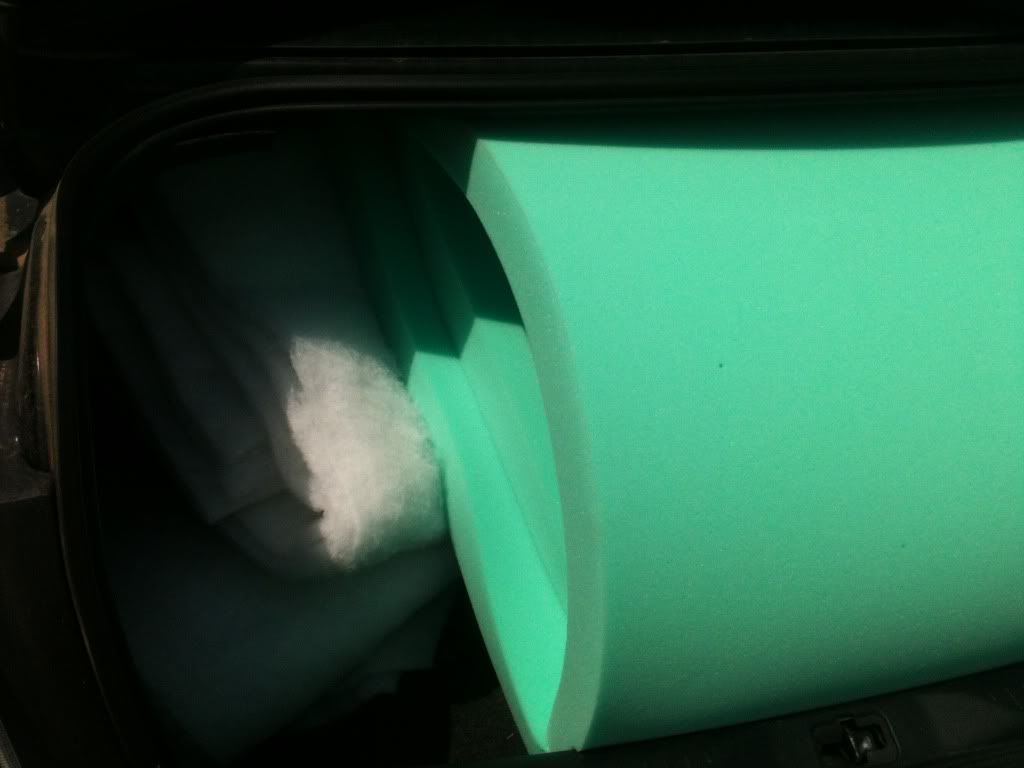
| The foam and batting took up our whole trunk. |
My goal was to make everything as simple as possible. The plywood came 4 feet tall, so that's how tall the headboard would be. (*Note: our ceilings are really high, so this look was fine for our room. If you have standard ceilings I would not suggest making your headboard this tall, or it will look very overpowering.) As you can see, I was originally planning on doing the white border around the whole headboard, but then I decided it would probably be beyond my basic sewing skills to make it look perfect and I didn't want to look at my sewing mistakes every day.
The shower curtain was 72'' x 72'', so it was plenty tall enough but about 9 inches short length-wise. I think I decided I wanted the white strips to be 4.5 inches on each side, but I added another 4-5 inches so I could wrap it around the sides and back. In hind site, I should have added at least another 2 inches of white to each side because it was almost too short to wrap around everything.
Enough talking-here are the pictures:
I didn't take a picture, but we used a round trash can lid as the template for cutting out the notches at the top. Make sure sweep/blow off all the sawdust before putting on the foam.
I probably would have used an electric knife to cut the edges if we had had one, but all we had were kitchen knives and they worked fine.
We also used spray adhesive to spray both the wood and the foam to ensure the foam didn't sag down over time, even though the fabric should hold it in place. When it comes to projects like these it's not worth it to take a shortcut when the results could cost way more in the long run. If you're making a smaller headboard this step probably wouldn't be as important.
I don't have any pictures of putting on the batting, but we basically put it on the top (we also sprayed the batting to the foam), and we worked around all the edges with me pulling it tight and Will staple-gunning it to the wood. I've seen people attach the legs first and stand it up to do the stapling, but Will was fine with sitting on the floor under the headboard and stapling.
Cut the border fabric, iron, pin it to the shower curtain, and sew it on.
Once you're done sewing you'll want to make sure you iron down your seams so they lie flat. I ironed mine towards the shower curtain because I was afraid they might show under the white fabric.
At this point we attached the legs. Will just measured how high the top of our mattress is off the ground and subtracted about 1.5 inches to determine how high to make the legs. Originally we only used two, but before we moved it into the house we added another two just to make sure it was secure (this thing was kind of heavy).
Lay out your fabric and make sure you have the same amount of white border on each side. I used the measuring tape each time we stapled just to make sure.
Ta da!
Like I mentioned we added two more legs just to make sure everything was secure. It's not the pretties solution but no one will ever see it. A few tutorials also had you covering the legs with fabric. We didn't do that because the legs are completely hidden by the bed.
Are you ready? Here's what it looked like when we left back in March:
And now:
We love it. Like, we LOVE love it. It's super plush, it fills up the wall, and it's everything I wanted. Will really likes it too.
Here's the budget break down:
Plywood: $8
Wood for legs (2x6s): free because we had it, but probably would have cost about $6 total
Shower curtain (this one): $25
White fabric: $7
Foam and batting: $85
Total: $125
$125 for a king-size headboard?! Yes, please. Most I saw online were at least $500 and way out of our price range. But utilizing sales and finding a much cheaper alternative to buying fabric by the yard, we were able to make a completely customized headboard for a price even college students can handle.
What do you think? Have you ever "hacked" something to make a more affordable but equally fabulous version?
Making a Headboard for $130 Part 1
I think I've mentioned this before, but our king-size bed is the only thing we've bought for our new house at a "real" store (not Ikea, TJ Maxx, Homegoods, or any other discount store). When we first got married we had a full-size bed, and it was just fine for us. My cat, Maggie, slept with us and things got a little tight sometimes (why do cats always think they get half the bed?), so we knew that when we moved into our next apartment or house we wanted to upgrade to a queen-size bed. Well, the next place we lived was Will's parents' house, and they have a queen bed and told us we could just trade them the full-size for the queen-size when we moved.
Maggie passed away last year, and a few months after that one of my in-law's dogs had to be put down. That left Boomer, who was obviously going through a rough period with losing his friend. Since Boomer had always been drawn to me and we planned on taking him with us when we moved (at this point we knew we would be going to Houston), we let him start sleeping with us.
Let me tell you: a cat takes up much less space than a dog, even a small dog. I've always had issues sleeping, and I really need my own little bubble to sleep well. Adding a dog who likes to snuggle and move around a lot during the night is not conducive to good sleep. We talked about getting a king-size bed when we moved, but I think after several weeks of dealing with me after I had very little sleep finally convinced Will it would be worth saving our relationship to just get a dang king-size bed.
It is the best thing we've ever purchased. I sleep so incredibly well, and Boomer also has all the room he needs.
The problem with king-size beds, though, is everything you need for them is crazy expensive. Sheets, comforters, bedskirts, pillows- they all cost way more than what we were used to paying for our little full-size bed. When they asked us if we wanted to pay $80 for the metal bed frame, we knew that's what we were going to have to do because we'repoor cheap on a budget.
But I dreamed of having a big, plush upholstered headboard that I could lean against while reading in bed.
Cue Pinterest.
I saw several inspiration photos that made me think we could build a headboard and save $$$ while still getting the look I wanted. Here are some of my favorite:
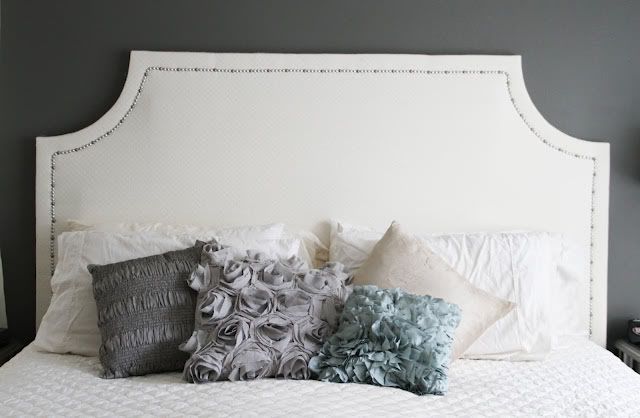
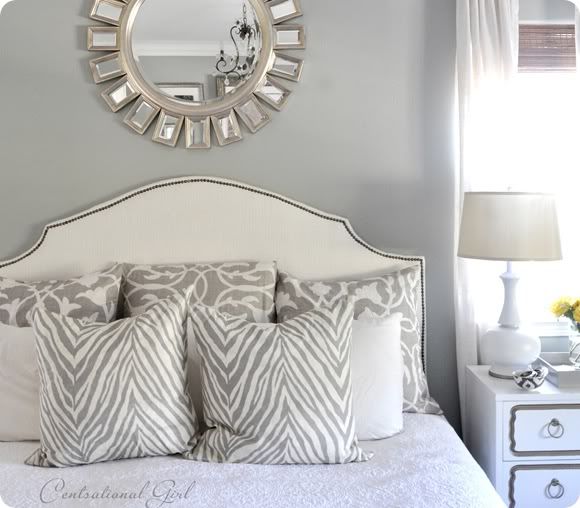
Lots of people probably recognize this one from Centsational Girl. I liked the brightness and the shape of this headboard, and I really fell in love with the nailhead trim. Unfortunately, Will doesn't have a lot of experience with a jig-saw and was a little weary of trying to cut out this kind of shape. He was willing to try, but wasn't sure how the execution would come out.
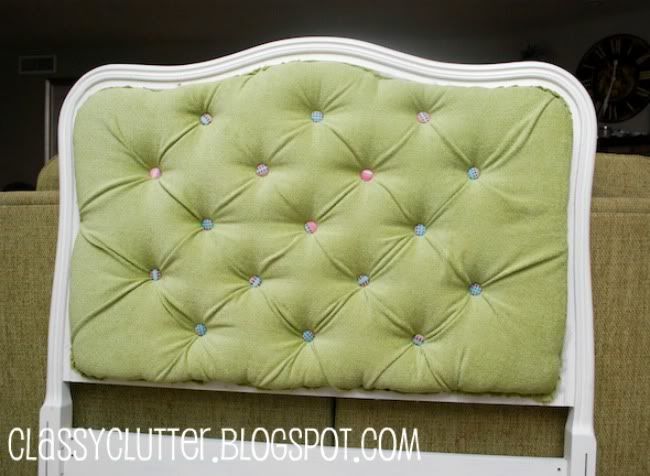
This one is from Classy Clutter. I really like the tufted look and I seriously considered it for several weeks. At the end of the day, though, I knew this would be a project I really needed my mom's help with and she wouldn't be visiting for at least several months, and I just wanted to get it done.
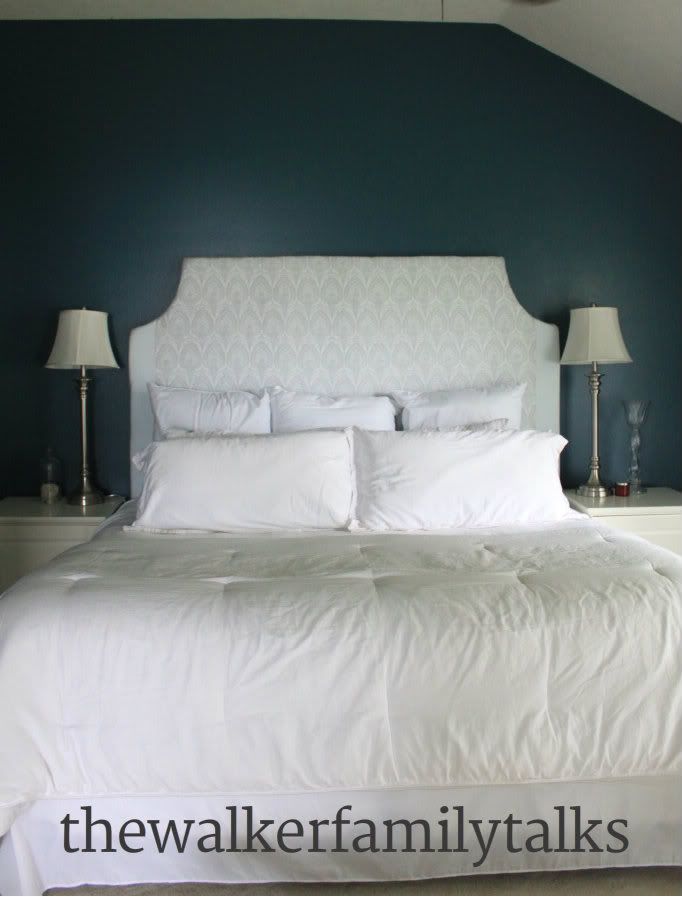
Then I saw this picture from Running from the Law. Still had the nailhead trim, still was light, but it was a much simpler shape that Will felt a lot more comfortable with. Sold.
Next I'll tell you how we made our own headboard for less than $130.
Maggie passed away last year, and a few months after that one of my in-law's dogs had to be put down. That left Boomer, who was obviously going through a rough period with losing his friend. Since Boomer had always been drawn to me and we planned on taking him with us when we moved (at this point we knew we would be going to Houston), we let him start sleeping with us.
Let me tell you: a cat takes up much less space than a dog, even a small dog. I've always had issues sleeping, and I really need my own little bubble to sleep well. Adding a dog who likes to snuggle and move around a lot during the night is not conducive to good sleep. We talked about getting a king-size bed when we moved, but I think after several weeks of dealing with me after I had very little sleep finally convinced Will it would be worth saving our relationship to just get a dang king-size bed.
It is the best thing we've ever purchased. I sleep so incredibly well, and Boomer also has all the room he needs.
The problem with king-size beds, though, is everything you need for them is crazy expensive. Sheets, comforters, bedskirts, pillows- they all cost way more than what we were used to paying for our little full-size bed. When they asked us if we wanted to pay $80 for the metal bed frame, we knew that's what we were going to have to do because we're
But I dreamed of having a big, plush upholstered headboard that I could lean against while reading in bed.
Cue Pinterest.
I saw several inspiration photos that made me think we could build a headboard and save $$$ while still getting the look I wanted. Here are some of my favorite:
Lots of people probably recognize this one from Centsational Girl. I liked the brightness and the shape of this headboard, and I really fell in love with the nailhead trim. Unfortunately, Will doesn't have a lot of experience with a jig-saw and was a little weary of trying to cut out this kind of shape. He was willing to try, but wasn't sure how the execution would come out.
This one is from Classy Clutter. I really like the tufted look and I seriously considered it for several weeks. At the end of the day, though, I knew this would be a project I really needed my mom's help with and she wouldn't be visiting for at least several months, and I just wanted to get it done.
Then I saw this picture from Running from the Law. Still had the nailhead trim, still was light, but it was a much simpler shape that Will felt a lot more comfortable with. Sold.
Next I'll tell you how we made our own headboard for less than $130.
Subscribe to:
Posts (Atom)