I last showed you how we made our king-size headboard for under $130. Though the room was feeling a lot more complete, it still needed some work (who am I kidding, it STILL needs some work).
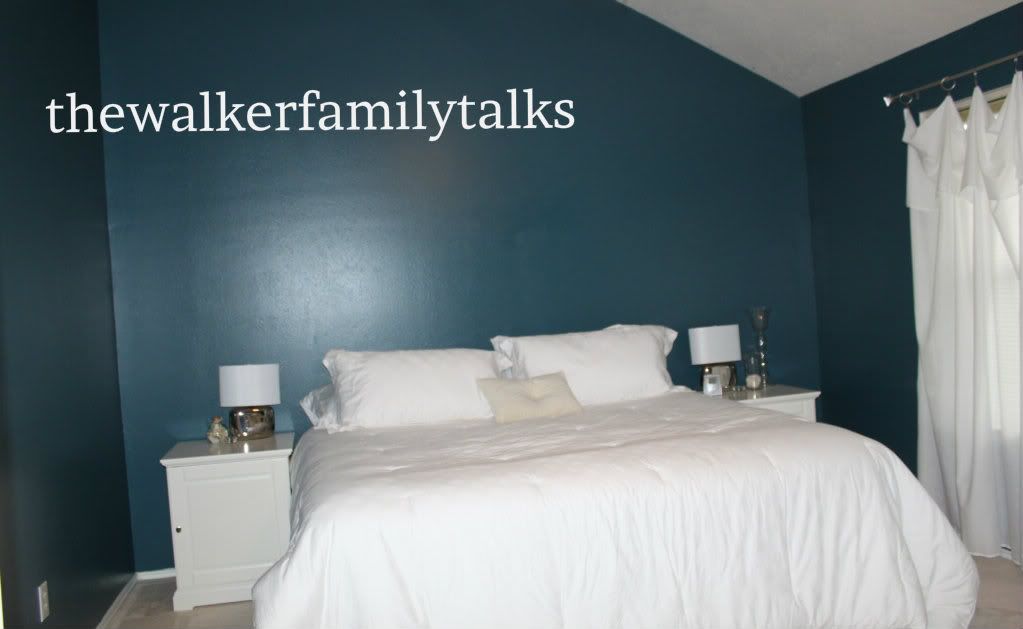
We painted the room Plumage by Martha Stewart over spring break and got some new furniture from Ikea. But a lot of things were still missing, namely a chair for Miss Freska (she loves chairs, especially when they're by the window), a bench of some sort for the foot of the bed, real curtains, and artwork.
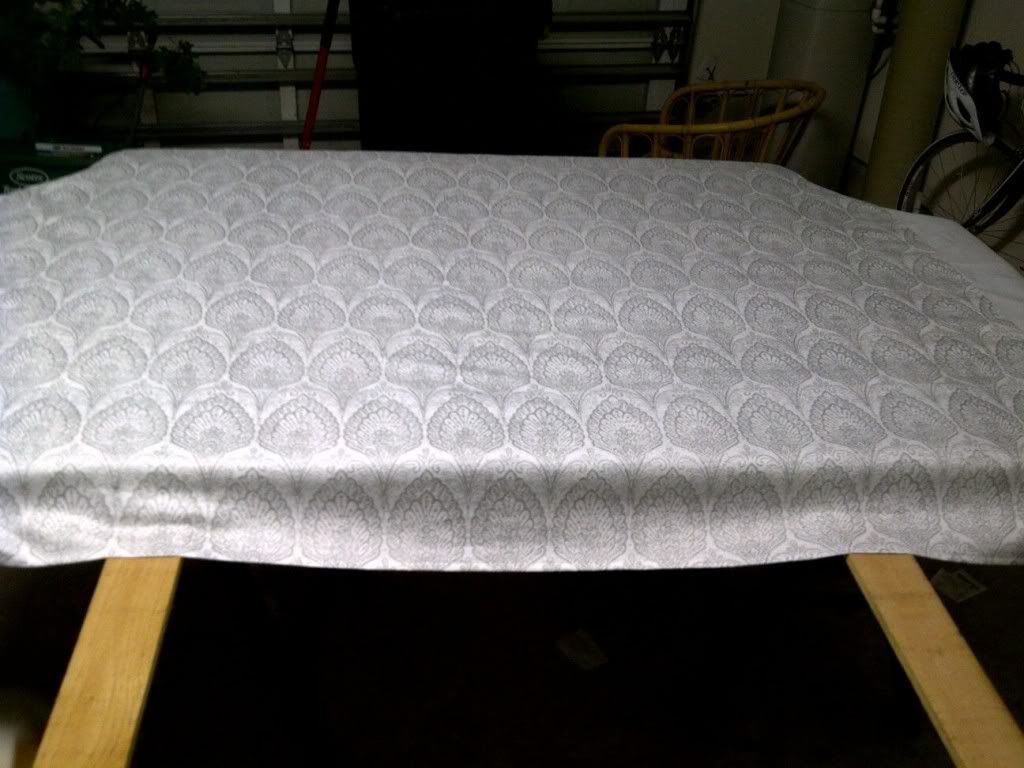
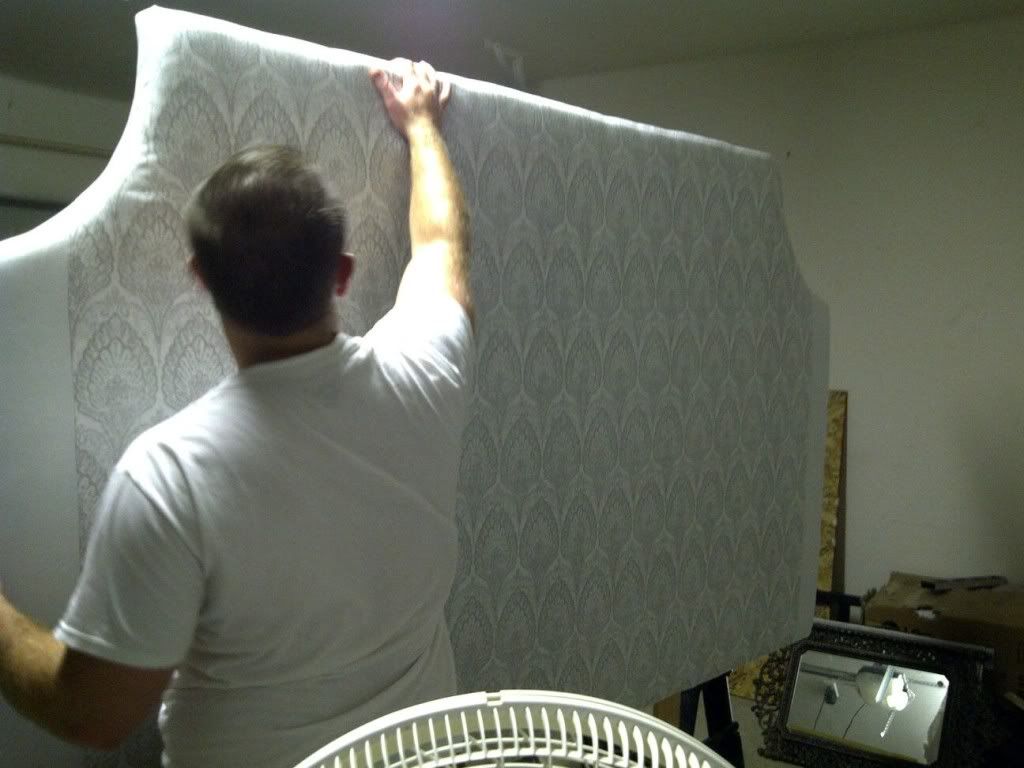
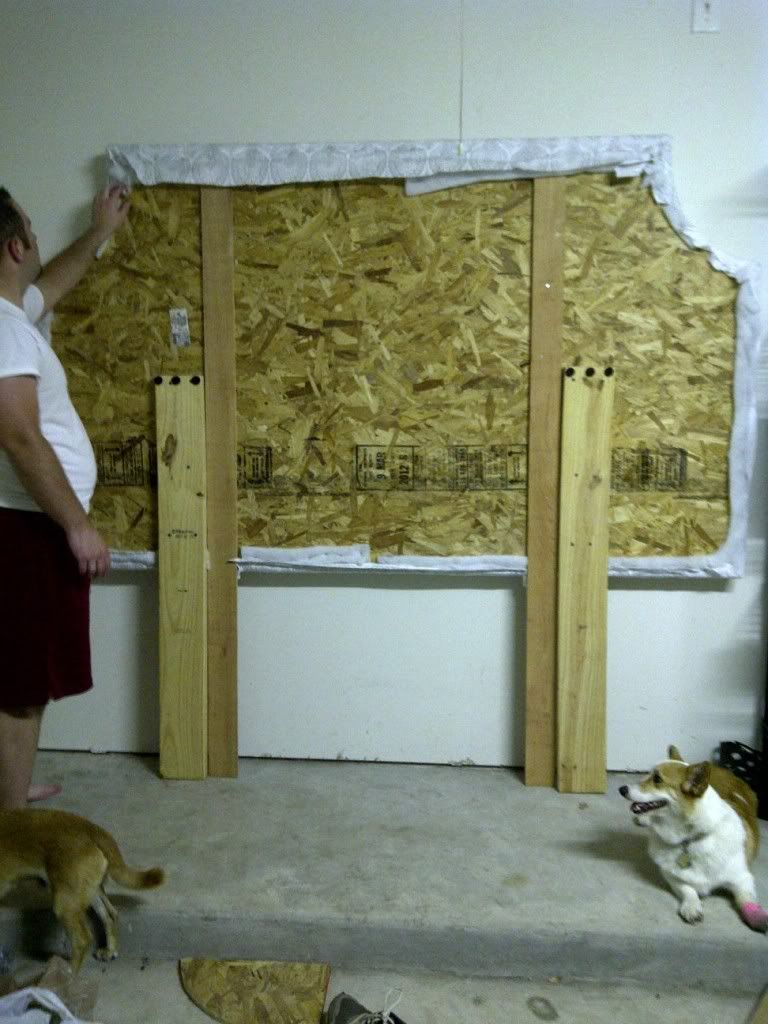
Here's what the room looked like immediately after we brought in the headboard:
It was okay, but great. Let me name all the things wrong with this: the new lamps I purchased in March are too short, the pillows don't look 'right,' there needs to be something either above the bed or above each lamp (or both). Also, our comforter was being cleaned so that made it look even worse.
I hunted and hunted for lamps. I really like the stacked glass ball lamps from Target, but at $40 a pop not including lamp shades, they were a bit out of our price range. I think I went to our closest TJ Maxx almost every other time I went to Home Depot (which if you follow me on Twitter you know is A LOT of times over the three weeks I was there). Finally the last week I was there I ran in and found these lamps:
They don't really look very big in this photo, but they were actually really tall, Will approved, and they were only $30 a piece (including the shade). Yes please.
But then, of course, I had to go down to Homegoods to see what treasures they might have for our office and I found some others that were the same height but looked a little more substantial (but for the same price). So of course I bought those and took all four lamps home for Will and me to have a little staging party. Since the scale of the bed and headboard (and even the side tables) is so big, we decided the first lamps were a little wimpy looking, so they went back to the store that evening.
Which left us with
Oh yes, please notice the Euro shams we also found at TJ Maxx. They don't actually have a pillow case on them right now since we'll have to order them, but since all our bedding is white you can't really tell unless you right next to them.
Things are starting to look a lot more complete at this point. I had two very large silver picture frames we used at our wedding reception that I was planning on hanging behind the lamps. Turns out what is "very large" in every day terms still looks too small when it's put next to a 4 ft headboard and tall lamps on a wall with a high ceiling. I was really disappointed at first because I was hoping to re-purpose what we already had so we didn't have to spend more money, but I finally decided I'd rather things look a little unfinished than plain weird to hold us over while we're waiting for something better.
So I moved the pictures to the corner behind our door when I put a chair from a thrift store that I refinished.
I paid either $12 or $15 for this. It is definitely not my normal style, but I liked that it was low to the ground for Freska (she only has one back leg and jumping high is a bit of a challenge), and I knew some spray paint would make it look a lot better. Plus, when we can afford something nicer for our room this would be great for a guest room so people can sit and tie their shoes.
I sanded it down, sprayed it with a gray primer, and then sprayed it with Rustoleum's Aluminum. It turned out really nicely, I think.
I couldn't find a cushion I liked for it, so for now I folded up a white blanket and put a small white pillow (that has apparently since been demolished but a certain female dog of mine) in it. Freska hasn't really used it yet, but Scarlett has hopped in there a few times.
A non-phone picture of the corner
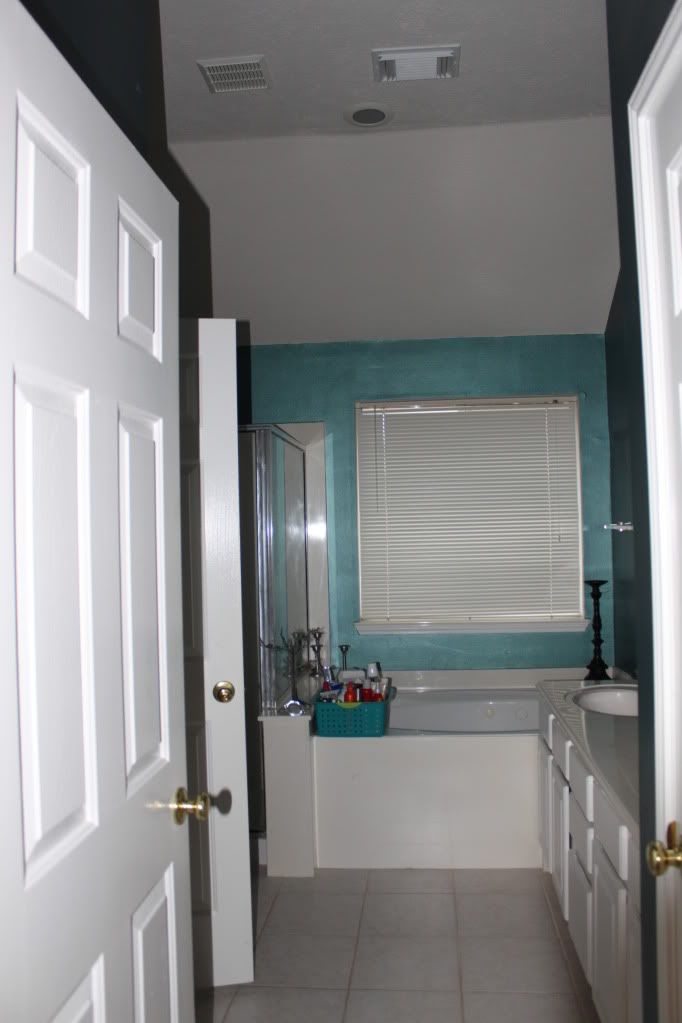
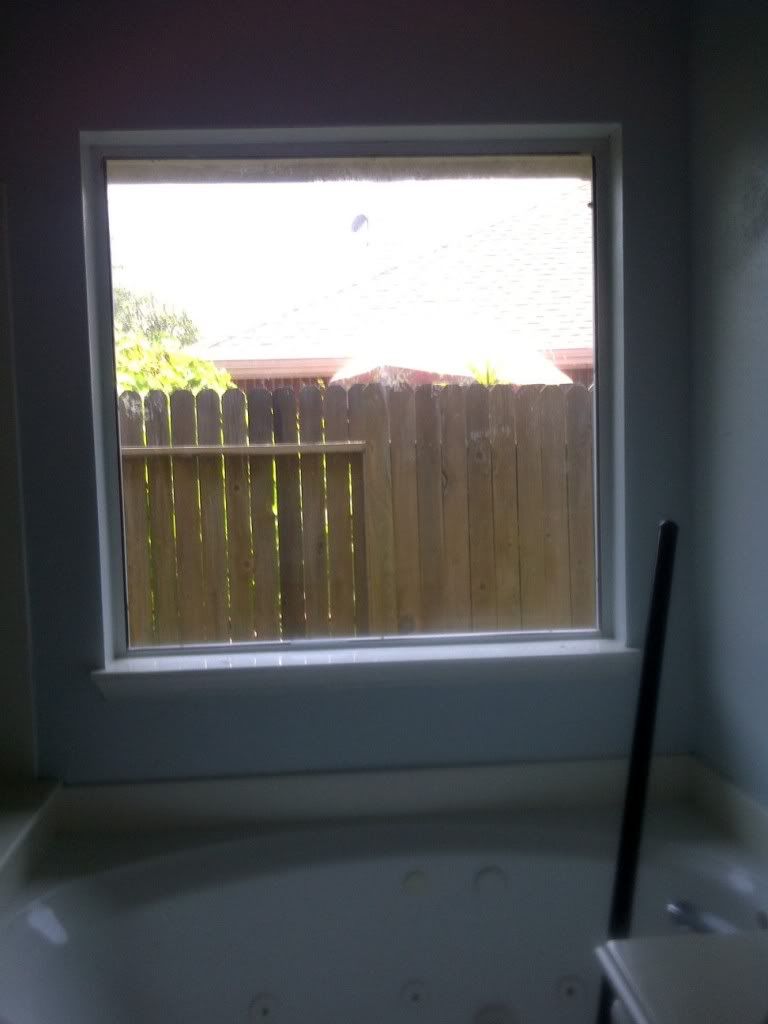
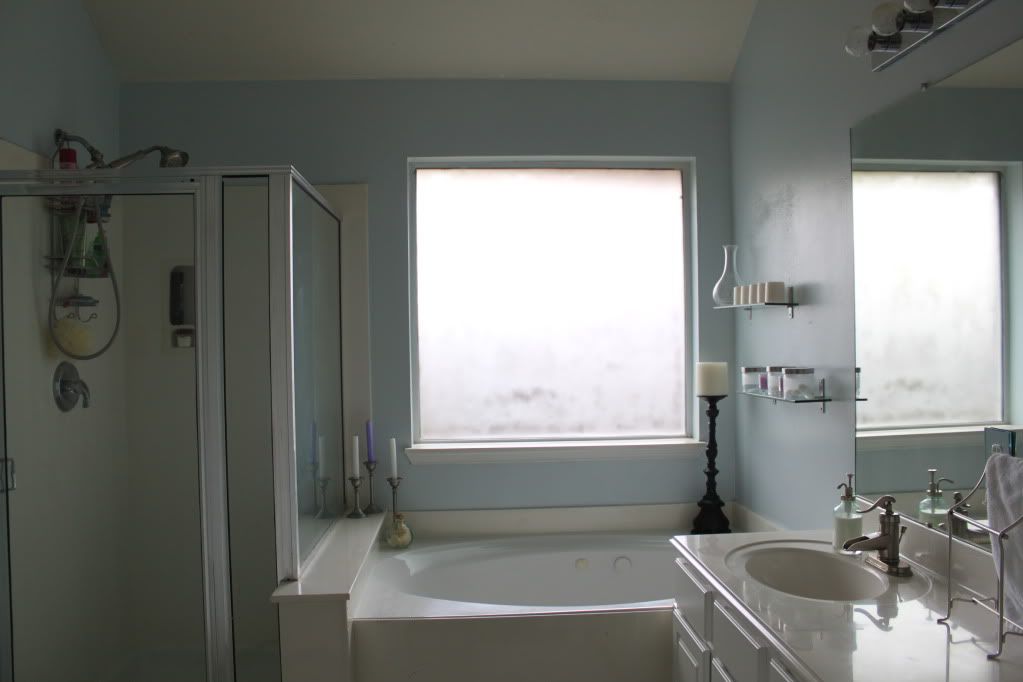
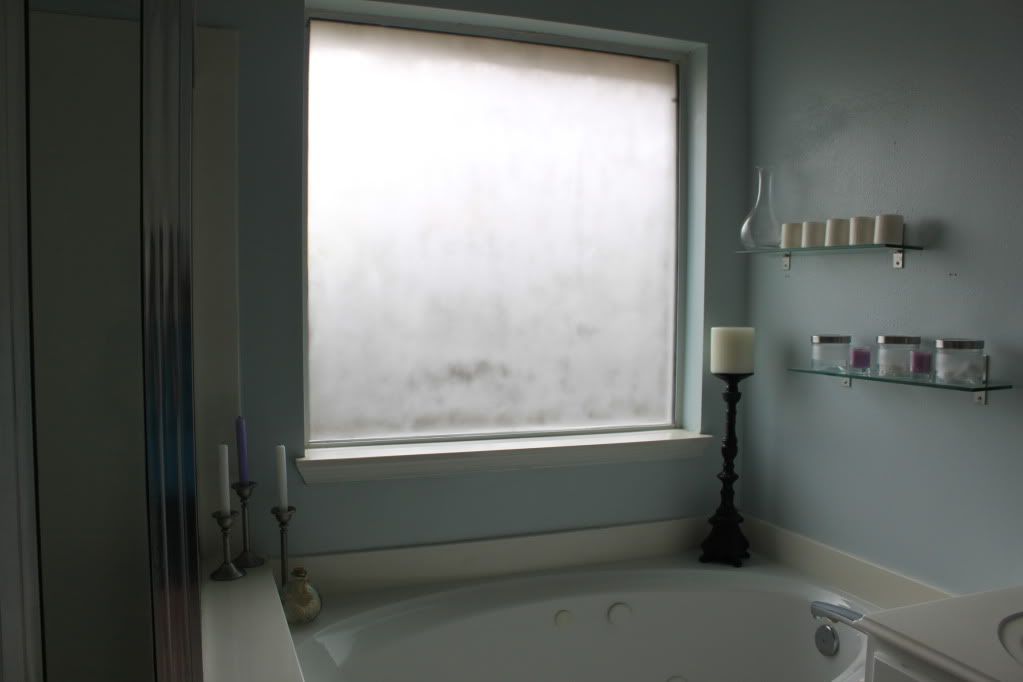
Moving around the room, you pass the door into our bathroom (that now matches the bedroom!) and then you come to the small wall with our dresser.
Nope, that mirror has still not been hung. It is insanely heave and will involve the location of studs. Plus, I don't think I'm strong enough to help Will hold it up while he's drilling. Sounds like a project for his dad to help him with!
P.S. Do you see the tip of the fans blades? We inherited some really nice fans in this house, but unfortunately they are just not our style. At. All. The fan in this room definitely gives it a more beachy vibe than sophisticated vibe. It's so hard to convince ourselves to replace it, though, since it was obviously an expensive fan and it works really well.
Details:
This big white candle was actually the unity candle in our wedding, and both the candle sticks were used as table decorations.
Just on the other side of the dresser is Scarlett's crate.
It's kind of an eye sore, but there's really no where else to put it. Boomer sleeps with us, but Scarlett actually likes to sleep by herself. In the evenings she'll go lay in front of her crate until we let her in so she can go to sleep. She doesn't get to sleep outside of the crate because she'll roam the house (and probably chase Freska), and she has had accidents inside so we're not taking any chances.
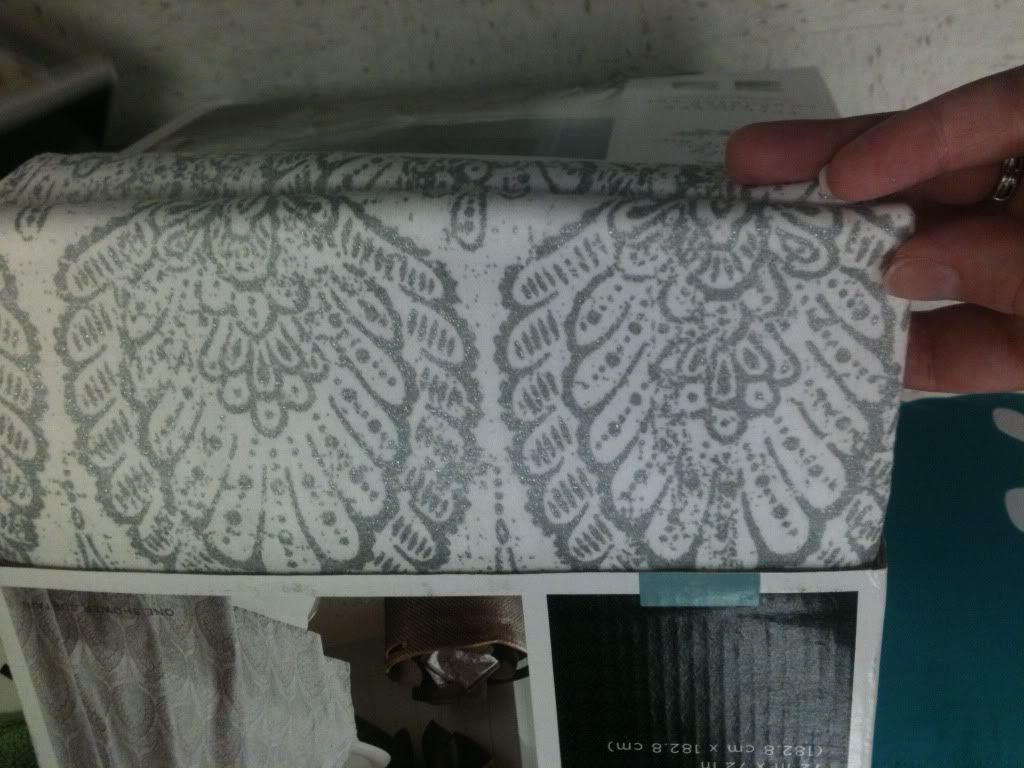
Next is our big window that overlooks the backyard. I absolutely love having a big window in the bedroom (I'm a sucker for natural light). I had temporarily hung some cheap Ikea sheets to act as curtains, but thankfully I found these at TJ Maxx for just $15 for two panels. I got four panels since the window is so wide.
Unfortunately they are way too short (curtains that don't at least skim the floor are one of my biggest pet peeves! They look so cheap and unprofessional, in my opinion.) I didn't have time to add some fabric to the bottom of them, so I think I'll tackle that project the next time I go down.
That chair is so Freska can get up in the window and look outside, her favorite past time.
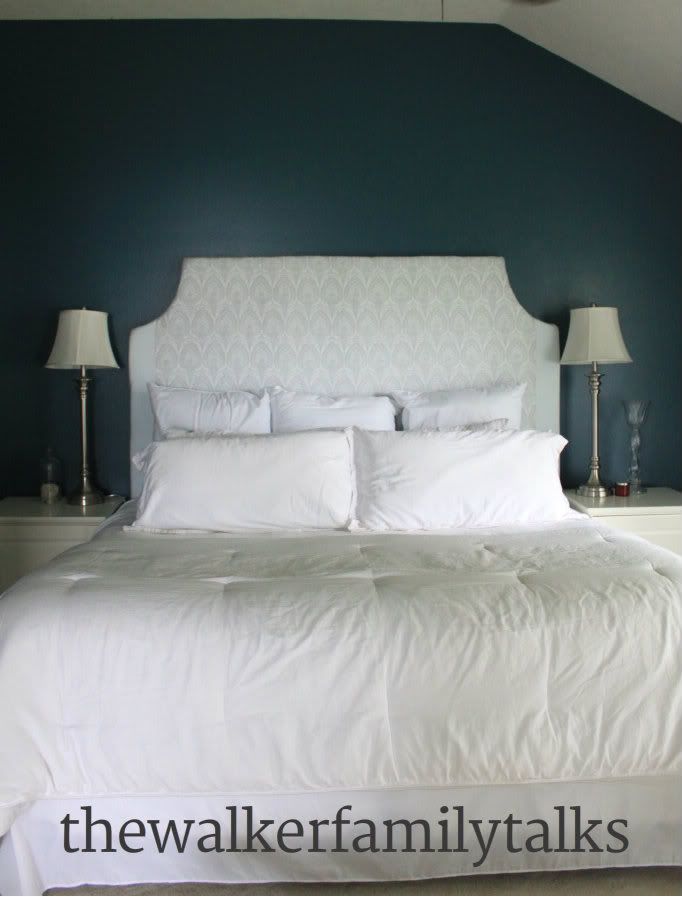
Which leads us back to the bed
I still want to add some pictures behind the lamps, and I have a DIY starbust mirror about half way finished. I actually started it several months ago up here, but I ran into some issues and need Will to help me saw some parts off. It's one of the smaller projects we didn't get to while I was down there, but I think we'll tackle it soon.
This big wall beside the bed also looks a little bare, but I'm not sure what to put up.
I don't want the room to feel cluttered, but I think something probably needs to go there. If we had kids it would definitely solve the problem, since I'm sure we'd put up some family photos.
So that's about it. We made some minor (and all cheap) changes but I feel like our room is slowly coming together. I can't wait to have another go at in a few months!
P.S. Sorry for some of the horrendous photos on all these posts about our house! I forgot to take my camera to Houston so all the photos taken the first two weeks were taken with my phone. I was able to get my camera when I came back for the night for my friend's baby shower, which is why some are decent quality.
What are some small changes you've made around the house that made a big difference?
Monday, July 16, 2012
Sunday, July 15, 2012
Making a Headboard for $130 Part 2
Did you miss Part 1?
Running from the Law had some really great instructions that we pretty much followed, but one of the big costs in making a headboard is the fabric. I knew we needed a high-quality fabric because we plan on having this headboard for many years. We both like to read or work on our computers in bed, so we knew the fabric would need to stand the test of time.
I found a few different fabrics I liked (they were all mainly Ikat patterns), but ultimately I decided that even at 50% off (making each yard at least $20), it was too much because I'd need four yards. Then I had an epiphany. What about shower curtains? Most of them are made out of heavy-duty material that will stand up over time, there are some with great patterns, and they are WAY cheaper, most coming in at under $30 for the whole thing.
I went to Target (oh how I love thee), and sent this picture to Will:
I believe his response was something along the lines of "whatever you want." I love that man.
I chose this curtain because it has a white background but the pattern is silver and adds a little shimmer. Since all our walls are a dark blue I knew we needed a light colored headboard to even things out a little. The only problem was that it wasn't wide enough to go across the whole width of a king-sized headboard. I thought about buying another one (at $25 a piece it would still have been cheaper than fabric), but I didn't want there to be weird lines on the headboard and I didn't want to worry about trying to match up the pattern along each seam. Finally I decided to get some cheap white fabric and make a border along the left and right side of the headboard.
One of the keys to keeping the cost down for a project like this is sale shopping. I went to Joann's while their foam and batting was 40% off AND I used a coupon that came in their mailer for 10% off sale items. I bought the two-inch foam because I knew we would be using the really cheap plywood and I wanted this baby to be plush. This is where I decided not to go with nailhead trim- I decided it was too much of a hassle for a look that I liked just as much as without the trim. I also bought some super cheap quilt batting to go over the foam to even out all the seams in the foam and make the sides more even. This is also a good chance to save money. We ended up with only a tiny sliver of foam left- I didn't buy any excess. Make your drawing with measurements before you buy anything. Here's mine:
My goal was to make everything as simple as possible. The plywood came 4 feet tall, so that's how tall the headboard would be. (*Note: our ceilings are really high, so this look was fine for our room. If you have standard ceilings I would not suggest making your headboard this tall, or it will look very overpowering.) As you can see, I was originally planning on doing the white border around the whole headboard, but then I decided it would probably be beyond my basic sewing skills to make it look perfect and I didn't want to look at my sewing mistakes every day.
The shower curtain was 72'' x 72'', so it was plenty tall enough but about 9 inches short length-wise. I think I decided I wanted the white strips to be 4.5 inches on each side, but I added another 4-5 inches so I could wrap it around the sides and back. In hind site, I should have added at least another 2 inches of white to each side because it was almost too short to wrap around everything.
Enough talking-here are the pictures:
I didn't take a picture, but we used a round trash can lid as the template for cutting out the notches at the top. Make sure sweep/blow off all the sawdust before putting on the foam.
I probably would have used an electric knife to cut the edges if we had had one, but all we had were kitchen knives and they worked fine.
We also used spray adhesive to spray both the wood and the foam to ensure the foam didn't sag down over time, even though the fabric should hold it in place. When it comes to projects like these it's not worth it to take a shortcut when the results could cost way more in the long run. If you're making a smaller headboard this step probably wouldn't be as important.
I don't have any pictures of putting on the batting, but we basically put it on the top (we also sprayed the batting to the foam), and we worked around all the edges with me pulling it tight and Will staple-gunning it to the wood. I've seen people attach the legs first and stand it up to do the stapling, but Will was fine with sitting on the floor under the headboard and stapling.
Cut the border fabric, iron, pin it to the shower curtain, and sew it on.
Once you're done sewing you'll want to make sure you iron down your seams so they lie flat. I ironed mine towards the shower curtain because I was afraid they might show under the white fabric.
At this point we attached the legs. Will just measured how high the top of our mattress is off the ground and subtracted about 1.5 inches to determine how high to make the legs. Originally we only used two, but before we moved it into the house we added another two just to make sure it was secure (this thing was kind of heavy).
Lay out your fabric and make sure you have the same amount of white border on each side. I used the measuring tape each time we stapled just to make sure.
Ta da!
Like I mentioned we added two more legs just to make sure everything was secure. It's not the pretties solution but no one will ever see it. A few tutorials also had you covering the legs with fabric. We didn't do that because the legs are completely hidden by the bed.
Are you ready? Here's what it looked like when we left back in March:
And now:
We love it. Like, we LOVE love it. It's super plush, it fills up the wall, and it's everything I wanted. Will really likes it too.
The pattern is super subtle, but it's enough to add a little visual interest. The white border, in my opinion, looks intentional and not like I ran out of the other fabric. If you are making a headboard for a smaller bed, a shower curtain that's 72'' wide would be plenty to cover the whole thing (well, depending on how thick you want your foam to be).
Here's the budget break down:
Plywood: $8
Wood for legs (2x6s): free because we had it, but probably would have cost about $6 total
Shower curtain (this one): $25
White fabric: $7
Foam and batting: $85
Total: $125
$125 for a king-size headboard?! Yes, please. Most I saw online were at least $500 and way out of our price range. But utilizing sales and finding a much cheaper alternative to buying fabric by the yard, we were able to make a completely customized headboard for a price even college students can handle.
What do you think? Have you ever "hacked" something to make a more affordable but equally fabulous version?
Running from the Law had some really great instructions that we pretty much followed, but one of the big costs in making a headboard is the fabric. I knew we needed a high-quality fabric because we plan on having this headboard for many years. We both like to read or work on our computers in bed, so we knew the fabric would need to stand the test of time.
I found a few different fabrics I liked (they were all mainly Ikat patterns), but ultimately I decided that even at 50% off (making each yard at least $20), it was too much because I'd need four yards. Then I had an epiphany. What about shower curtains? Most of them are made out of heavy-duty material that will stand up over time, there are some with great patterns, and they are WAY cheaper, most coming in at under $30 for the whole thing.
I went to Target (oh how I love thee), and sent this picture to Will:
I believe his response was something along the lines of "whatever you want." I love that man.
I chose this curtain because it has a white background but the pattern is silver and adds a little shimmer. Since all our walls are a dark blue I knew we needed a light colored headboard to even things out a little. The only problem was that it wasn't wide enough to go across the whole width of a king-sized headboard. I thought about buying another one (at $25 a piece it would still have been cheaper than fabric), but I didn't want there to be weird lines on the headboard and I didn't want to worry about trying to match up the pattern along each seam. Finally I decided to get some cheap white fabric and make a border along the left and right side of the headboard.
| The foam and batting took up our whole trunk. |
My goal was to make everything as simple as possible. The plywood came 4 feet tall, so that's how tall the headboard would be. (*Note: our ceilings are really high, so this look was fine for our room. If you have standard ceilings I would not suggest making your headboard this tall, or it will look very overpowering.) As you can see, I was originally planning on doing the white border around the whole headboard, but then I decided it would probably be beyond my basic sewing skills to make it look perfect and I didn't want to look at my sewing mistakes every day.
The shower curtain was 72'' x 72'', so it was plenty tall enough but about 9 inches short length-wise. I think I decided I wanted the white strips to be 4.5 inches on each side, but I added another 4-5 inches so I could wrap it around the sides and back. In hind site, I should have added at least another 2 inches of white to each side because it was almost too short to wrap around everything.
Enough talking-here are the pictures:
I didn't take a picture, but we used a round trash can lid as the template for cutting out the notches at the top. Make sure sweep/blow off all the sawdust before putting on the foam.
I probably would have used an electric knife to cut the edges if we had had one, but all we had were kitchen knives and they worked fine.
We also used spray adhesive to spray both the wood and the foam to ensure the foam didn't sag down over time, even though the fabric should hold it in place. When it comes to projects like these it's not worth it to take a shortcut when the results could cost way more in the long run. If you're making a smaller headboard this step probably wouldn't be as important.
I don't have any pictures of putting on the batting, but we basically put it on the top (we also sprayed the batting to the foam), and we worked around all the edges with me pulling it tight and Will staple-gunning it to the wood. I've seen people attach the legs first and stand it up to do the stapling, but Will was fine with sitting on the floor under the headboard and stapling.
Cut the border fabric, iron, pin it to the shower curtain, and sew it on.
Once you're done sewing you'll want to make sure you iron down your seams so they lie flat. I ironed mine towards the shower curtain because I was afraid they might show under the white fabric.
At this point we attached the legs. Will just measured how high the top of our mattress is off the ground and subtracted about 1.5 inches to determine how high to make the legs. Originally we only used two, but before we moved it into the house we added another two just to make sure it was secure (this thing was kind of heavy).
Lay out your fabric and make sure you have the same amount of white border on each side. I used the measuring tape each time we stapled just to make sure.
Ta da!
Like I mentioned we added two more legs just to make sure everything was secure. It's not the pretties solution but no one will ever see it. A few tutorials also had you covering the legs with fabric. We didn't do that because the legs are completely hidden by the bed.
Are you ready? Here's what it looked like when we left back in March:
And now:
We love it. Like, we LOVE love it. It's super plush, it fills up the wall, and it's everything I wanted. Will really likes it too.
Here's the budget break down:
Plywood: $8
Wood for legs (2x6s): free because we had it, but probably would have cost about $6 total
Shower curtain (this one): $25
White fabric: $7
Foam and batting: $85
Total: $125
$125 for a king-size headboard?! Yes, please. Most I saw online were at least $500 and way out of our price range. But utilizing sales and finding a much cheaper alternative to buying fabric by the yard, we were able to make a completely customized headboard for a price even college students can handle.
What do you think? Have you ever "hacked" something to make a more affordable but equally fabulous version?
Making a Headboard for $130 Part 1
I think I've mentioned this before, but our king-size bed is the only thing we've bought for our new house at a "real" store (not Ikea, TJ Maxx, Homegoods, or any other discount store). When we first got married we had a full-size bed, and it was just fine for us. My cat, Maggie, slept with us and things got a little tight sometimes (why do cats always think they get half the bed?), so we knew that when we moved into our next apartment or house we wanted to upgrade to a queen-size bed. Well, the next place we lived was Will's parents' house, and they have a queen bed and told us we could just trade them the full-size for the queen-size when we moved.
Maggie passed away last year, and a few months after that one of my in-law's dogs had to be put down. That left Boomer, who was obviously going through a rough period with losing his friend. Since Boomer had always been drawn to me and we planned on taking him with us when we moved (at this point we knew we would be going to Houston), we let him start sleeping with us.
Let me tell you: a cat takes up much less space than a dog, even a small dog. I've always had issues sleeping, and I really need my own little bubble to sleep well. Adding a dog who likes to snuggle and move around a lot during the night is not conducive to good sleep. We talked about getting a king-size bed when we moved, but I think after several weeks of dealing with me after I had very little sleep finally convinced Will it would be worth saving our relationship to just get a dang king-size bed.
It is the best thing we've ever purchased. I sleep so incredibly well, and Boomer also has all the room he needs.
The problem with king-size beds, though, is everything you need for them is crazy expensive. Sheets, comforters, bedskirts, pillows- they all cost way more than what we were used to paying for our little full-size bed. When they asked us if we wanted to pay $80 for the metal bed frame, we knew that's what we were going to have to do because we'repoor cheap on a budget.
But I dreamed of having a big, plush upholstered headboard that I could lean against while reading in bed.
Cue Pinterest.
I saw several inspiration photos that made me think we could build a headboard and save $$$ while still getting the look I wanted. Here are some of my favorite:
Lots of people probably recognize this one from Centsational Girl. I liked the brightness and the shape of this headboard, and I really fell in love with the nailhead trim. Unfortunately, Will doesn't have a lot of experience with a jig-saw and was a little weary of trying to cut out this kind of shape. He was willing to try, but wasn't sure how the execution would come out.
This one is from Classy Clutter. I really like the tufted look and I seriously considered it for several weeks. At the end of the day, though, I knew this would be a project I really needed my mom's help with and she wouldn't be visiting for at least several months, and I just wanted to get it done.
Then I saw this picture from Running from the Law. Still had the nailhead trim, still was light, but it was a much simpler shape that Will felt a lot more comfortable with. Sold.
Next I'll tell you how we made our own headboard for less than $130.
Maggie passed away last year, and a few months after that one of my in-law's dogs had to be put down. That left Boomer, who was obviously going through a rough period with losing his friend. Since Boomer had always been drawn to me and we planned on taking him with us when we moved (at this point we knew we would be going to Houston), we let him start sleeping with us.
Let me tell you: a cat takes up much less space than a dog, even a small dog. I've always had issues sleeping, and I really need my own little bubble to sleep well. Adding a dog who likes to snuggle and move around a lot during the night is not conducive to good sleep. We talked about getting a king-size bed when we moved, but I think after several weeks of dealing with me after I had very little sleep finally convinced Will it would be worth saving our relationship to just get a dang king-size bed.
It is the best thing we've ever purchased. I sleep so incredibly well, and Boomer also has all the room he needs.
The problem with king-size beds, though, is everything you need for them is crazy expensive. Sheets, comforters, bedskirts, pillows- they all cost way more than what we were used to paying for our little full-size bed. When they asked us if we wanted to pay $80 for the metal bed frame, we knew that's what we were going to have to do because we're
But I dreamed of having a big, plush upholstered headboard that I could lean against while reading in bed.
Cue Pinterest.
I saw several inspiration photos that made me think we could build a headboard and save $$$ while still getting the look I wanted. Here are some of my favorite:
Lots of people probably recognize this one from Centsational Girl. I liked the brightness and the shape of this headboard, and I really fell in love with the nailhead trim. Unfortunately, Will doesn't have a lot of experience with a jig-saw and was a little weary of trying to cut out this kind of shape. He was willing to try, but wasn't sure how the execution would come out.
This one is from Classy Clutter. I really like the tufted look and I seriously considered it for several weeks. At the end of the day, though, I knew this would be a project I really needed my mom's help with and she wouldn't be visiting for at least several months, and I just wanted to get it done.
Then I saw this picture from Running from the Law. Still had the nailhead trim, still was light, but it was a much simpler shape that Will felt a lot more comfortable with. Sold.
Next I'll tell you how we made our own headboard for less than $130.
Friday, July 13, 2012
Master Bathroom Re-Do
One of the things I was most excited about in our new house is the master bathroom. It's got double sinks and a private "watercloset" as I like to call it, which is really nice when you're sharing a bathroom with a boy who is messy (around the sink, that is). It also has a separate shower and tub, which is awesome for the evenings when I take a 1.5 hour bath and Will just wants a quick shower. Our master closet is also pretty nice, although I can see a few logistical problems coming our way when I actually get to move all of my stuff in.
But I was not crazy about the paint color (which matched the crazy accent wall in the living room when we moved in.)
I knew this was going to be a big project, and honestly I wasn't sure I wanted to tackle it while I was there this summer. Ultimately, though, Will and I decided we wanted to get our "suite" finished sooner rather than later. We realized that this will probably be the only chance we have to spend selfishly on our bedroom and bathroom because the next time we move (or want to re-decorate) we will most likely have children.
The reason this was such a big project is because (A) the whole bathroom has really high ceilings (I think they're 12 ft, but they could be 10 ft), which means I spend a lot of time on the top of our ladder, (B) because the previous color was so dark I would have to prime it, and (C) there were a lot of really tiny nooks and "walls" that were really tedious to paint.
I decided to go with "Salt Glaze" by Martha Stewart in semi-gloss.
But first, we (and by we I really mean "I" with a little help from Will occasionally :) ) primed.
Looking back, I really should have done two coats of primer. I ended up have to put three coats of paint in most places.
Unfortunately, there were a few places neither Will nor I could reach to paint (especially in the watercloset area, where the ladder couldn't fit around the toilet.) We'll have to wait until our friend decides to visit from College Station (come visit soon, Jonathan!) and can help us out with the height problem.
#shortpeopleproblems
Le sigh.
Anyway, here are the finished pictures
As you can see, we frosted this window. I hated the blinds but we needed the privacy and I wanted the natural light. I originally bought some film from the Home Depot to cover the window, but, err, that didn't work out so well. The piece of film would have worked well, but it was too big (even for two people) and the window was just too big to get all of the air bubbles out. Luckily part of the film wasn't even sticky so we were able to return it gilt-free and we got some of the frosted glass spray paint.
I taped all around the window and hung some paper around the wall so the spray paint didn't get on anything else and we were really happy with the way it turned out. It took several layers and for some weird reason there are still a few spots that aren't "even" but it doesn't bother us enough to try and figure out how to fix it (I tried adding several layers to just those spots but no dice).
I am in LOVE with how light and airy it feels in there now.
In this picture you can see the gaping hold in the wall where I took out the medicine cabinet. I am so happy it's gone, but it's looking a little rough unfinished. We were going to replace the sheet rock to make it a solid wall, but I think we're going to finish it out to make a little nook for a vase or something.
The other big thing I did was take out the old towel rack above the tub (I knew we'd never use it) and replace it with some glass shelves from Ikea. Currently they are holding candles and my jars with cotton balls, q-tips, and my flossers.
I hung up some photo frames the day before I left. They're okay for now, but I don't think I'll leave them forever.
Sorry for this horrible photo. I took my "after" pictures before I hung all these on the wall, so Will had to text some phone pics for me.
Overall, I am so happy with how this room turned out. I wanted it to feel like our own little spa and I definitely feel like we accomplished that. There are still many things I'd like to do in here (replace/paint the door handles, frame out the mirror and add some shelves to the center of the mirror, get some new light fixtures, new artwork, etc.)
Unfortunately, the trim is going to need a lot of touch-ups. When the previous owners painted the teal color, they got a lot of paint on the trim. When the whole room was painted that color it wasn't too noticeable, but now it is.
I'm linking to Sarah at Thrifty Decor Chick:
Have you made any tedious but worth-it changes in your house lately?
But I was not crazy about the paint color (which matched the crazy accent wall in the living room when we moved in.)
| "Before" view from the bedroom |
| Matching paint! |
The reason this was such a big project is because (A) the whole bathroom has really high ceilings (I think they're 12 ft, but they could be 10 ft), which means I spend a lot of time on the top of our ladder, (B) because the previous color was so dark I would have to prime it, and (C) there were a lot of really tiny nooks and "walls" that were really tedious to paint.
I decided to go with "Salt Glaze" by Martha Stewart in semi-gloss.
But first, we (and by we I really mean "I" with a little help from Will occasionally :) ) primed.
Looking back, I really should have done two coats of primer. I ended up have to put three coats of paint in most places.
Unfortunately, there were a few places neither Will nor I could reach to paint (especially in the watercloset area, where the ladder couldn't fit around the toilet.) We'll have to wait until our friend decides to visit from College Station (come visit soon, Jonathan!) and can help us out with the height problem.
#shortpeopleproblems
Le sigh.
Anyway, here are the finished pictures
| Pre-frosted |
I taped all around the window and hung some paper around the wall so the spray paint didn't get on anything else and we were really happy with the way it turned out. It took several layers and for some weird reason there are still a few spots that aren't "even" but it doesn't bother us enough to try and figure out how to fix it (I tried adding several layers to just those spots but no dice).
| Post-frosted |
| See the few spots along the bottom of the window? |
In this picture you can see the gaping hold in the wall where I took out the medicine cabinet. I am so happy it's gone, but it's looking a little rough unfinished. We were going to replace the sheet rock to make it a solid wall, but I think we're going to finish it out to make a little nook for a vase or something.
The other big thing I did was take out the old towel rack above the tub (I knew we'd never use it) and replace it with some glass shelves from Ikea. Currently they are holding candles and my jars with cotton balls, q-tips, and my flossers.
I hung up some photo frames the day before I left. They're okay for now, but I don't think I'll leave them forever.
Sorry for this horrible photo. I took my "after" pictures before I hung all these on the wall, so Will had to text some phone pics for me.
Overall, I am so happy with how this room turned out. I wanted it to feel like our own little spa and I definitely feel like we accomplished that. There are still many things I'd like to do in here (replace/paint the door handles, frame out the mirror and add some shelves to the center of the mirror, get some new light fixtures, new artwork, etc.)
Unfortunately, the trim is going to need a lot of touch-ups. When the previous owners painted the teal color, they got a lot of paint on the trim. When the whole room was painted that color it wasn't too noticeable, but now it is.
I'm linking to Sarah at Thrifty Decor Chick:
Have you made any tedious but worth-it changes in your house lately?
Subscribe to:
Posts (Atom)